
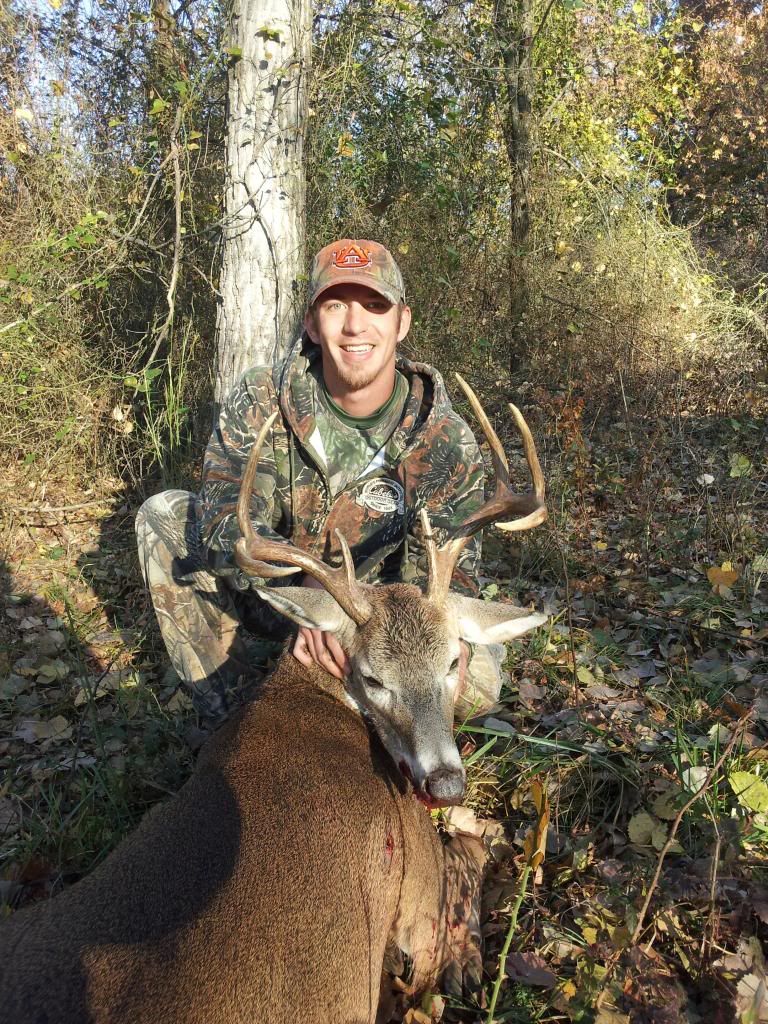
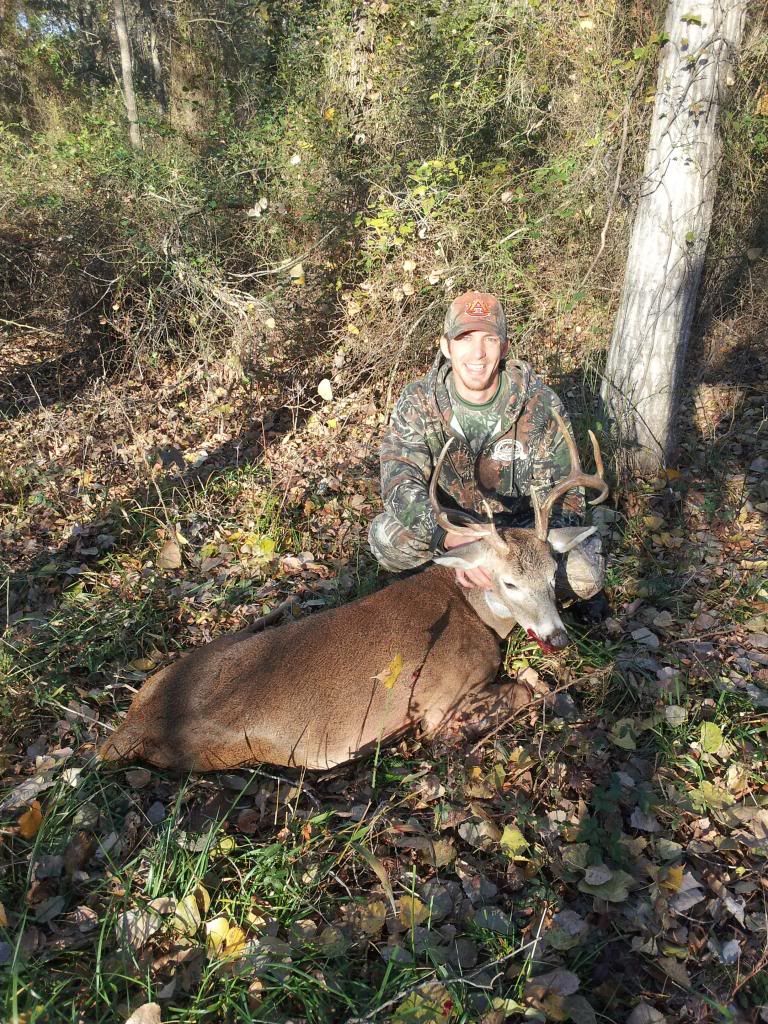
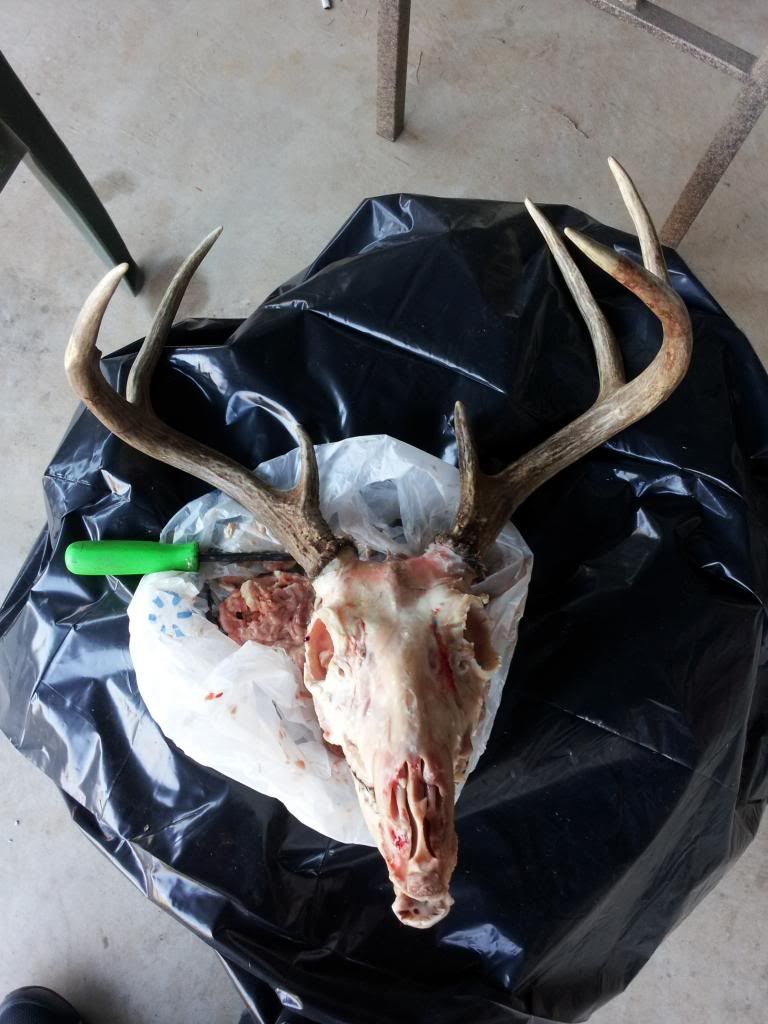
I started by skinning the head within a few hours of the kill. With the muscles and skin still warm, it was pliable and much easier to work with and remove. I used a filet knife to help skin it out. The nose area is tricky as it's mostly cartilage and easily cut. The same with the eye sockets, so be careful what you trim. I nicked mine up pretty good as I was a bit too aggressive with the trimming. The eyeballs are a pain, but with a screwdriver, you can ease them out a bit, then make your cuts around them with the filet knife to remove them. The more meat that is removed now will make your life easier later.
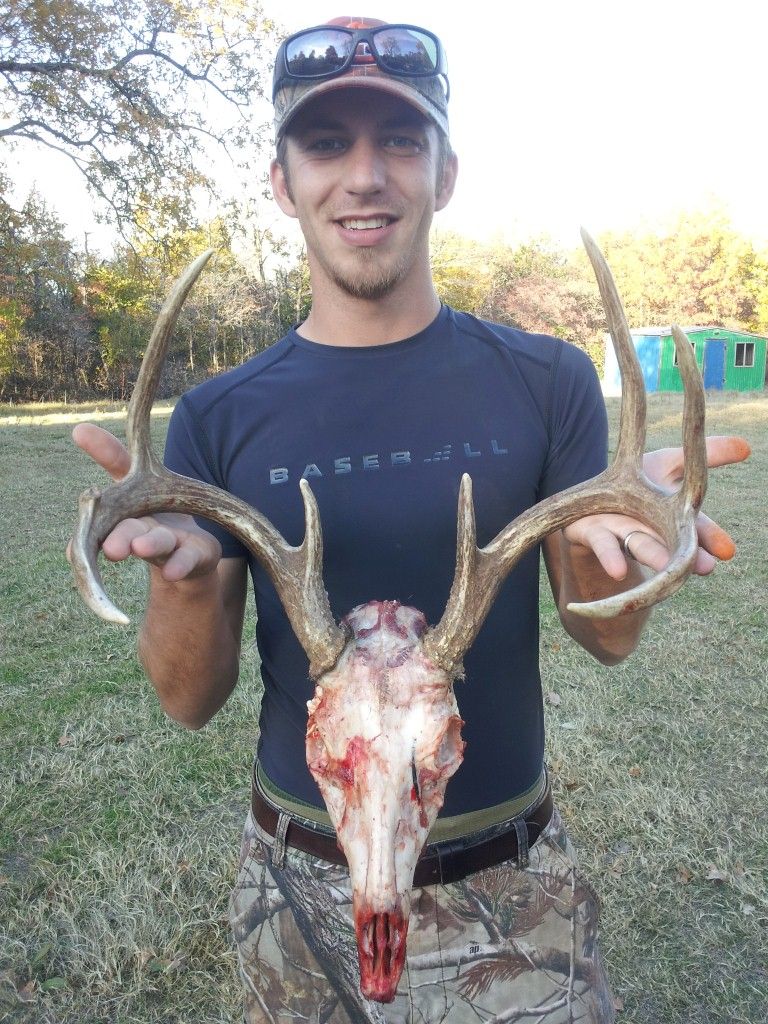
After skinning the head.
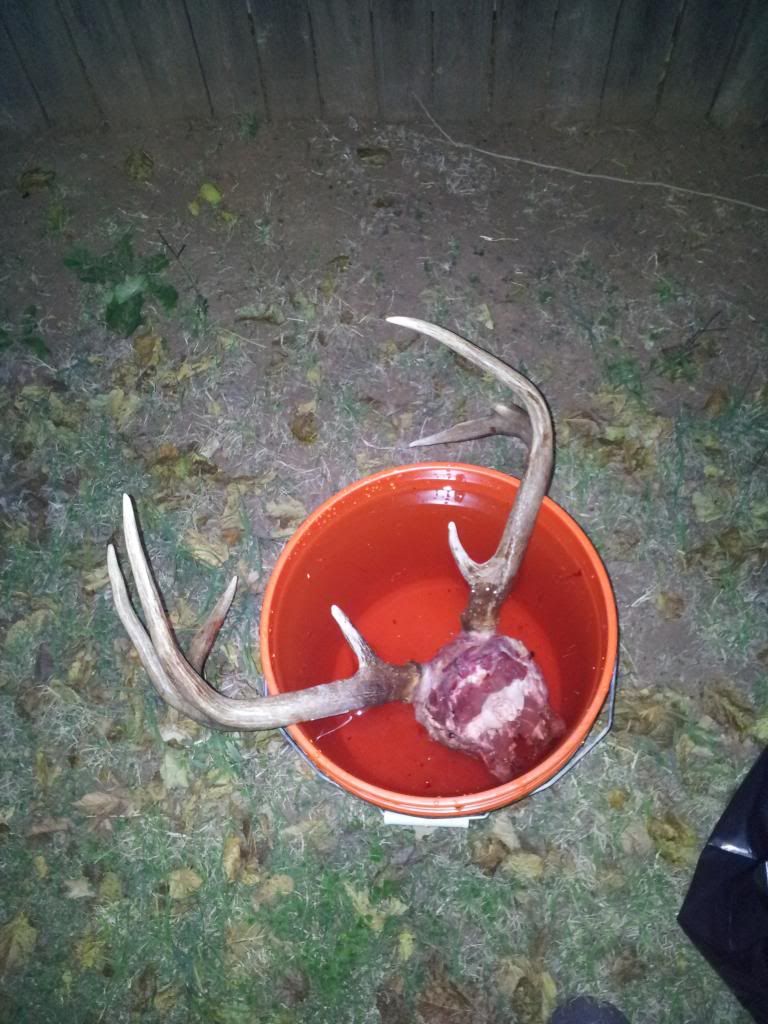
I filled a 5 gallon bucket with just tap water and soaked the skull for 24 hours.
After 24 hours, I pulled the skull out and used a screwdriver to remove as much of the brain as possible. The brain has started to liquefy, but the outer casing of the brain, if you will, is still somewhat attached.
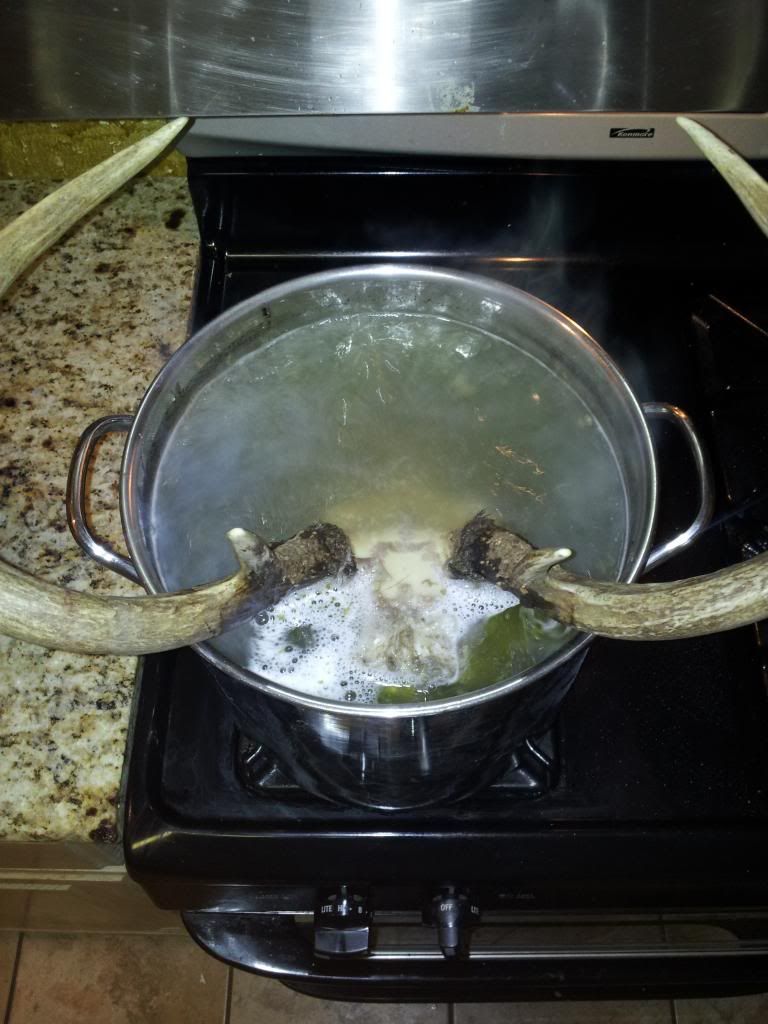
I soaked him for another 24 hours before getting my wife out of the house so I could start boiling the skull. I filled the pot with water, placed the skull in, then set the burner to high. At this point, I added a few drops of dawn dish soap to help with the smell that I knew would occur but also to help cut the grease and fat off the skull. Upon review, I would suggest covering the bases of the antlers in saran-wrap and aluminum foil to prevent the darkening that occurs as the boiled water soaks the antlers. Also, wrap the section of the antler that will touch the pot in aluminum foil to prevent the direct contact with the heat. If the antlers are not large enough to hold them out of the water, use a wire hanger, and gently wrap it around the antler bases then attach it to the handles on the outside of the pot to hold it up.

After an hour, the water finally started boiling. I turned it down a bit as I wanted a slow boil. There was some random junk that had started to float, so I skimmed it out with a fork. Another hour later, I added about two cereal bowls full of water to maintain the water level. The water will start to boil again in about 5 minutes.
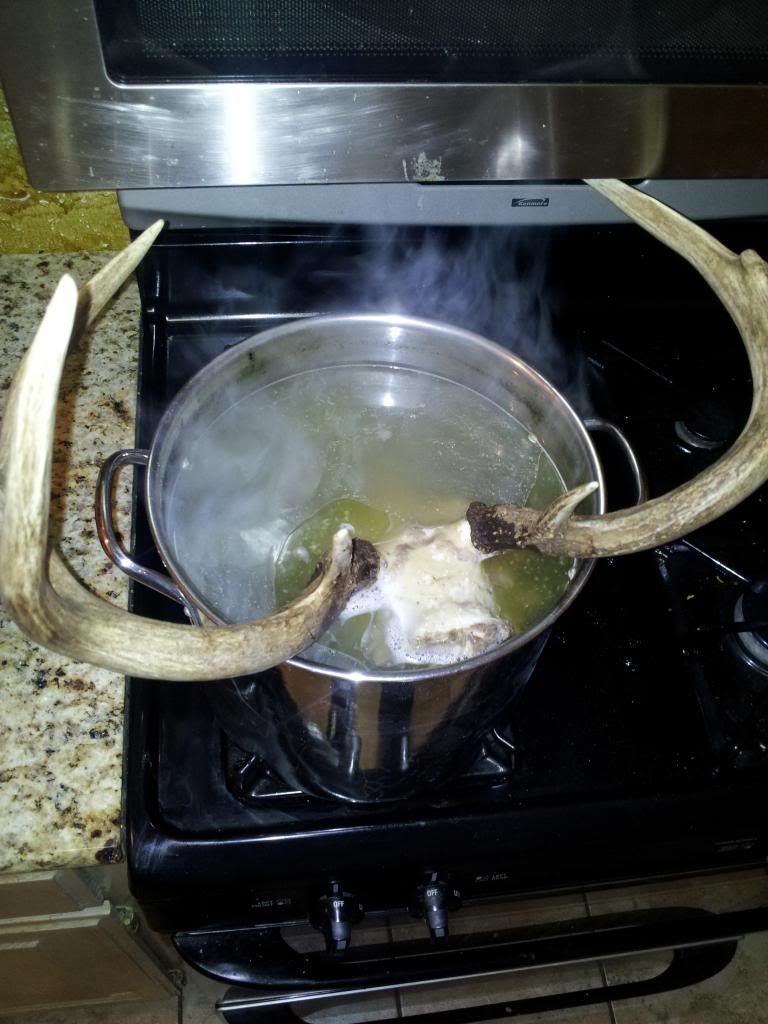
After 3 hours of boiling you could tell stuff was loosening off the bone and I used the fork to pull some of it away. 3 hour mark:
After 4 hours, I pulled the pot off the burner and headed for the garage. 4 hour mark:
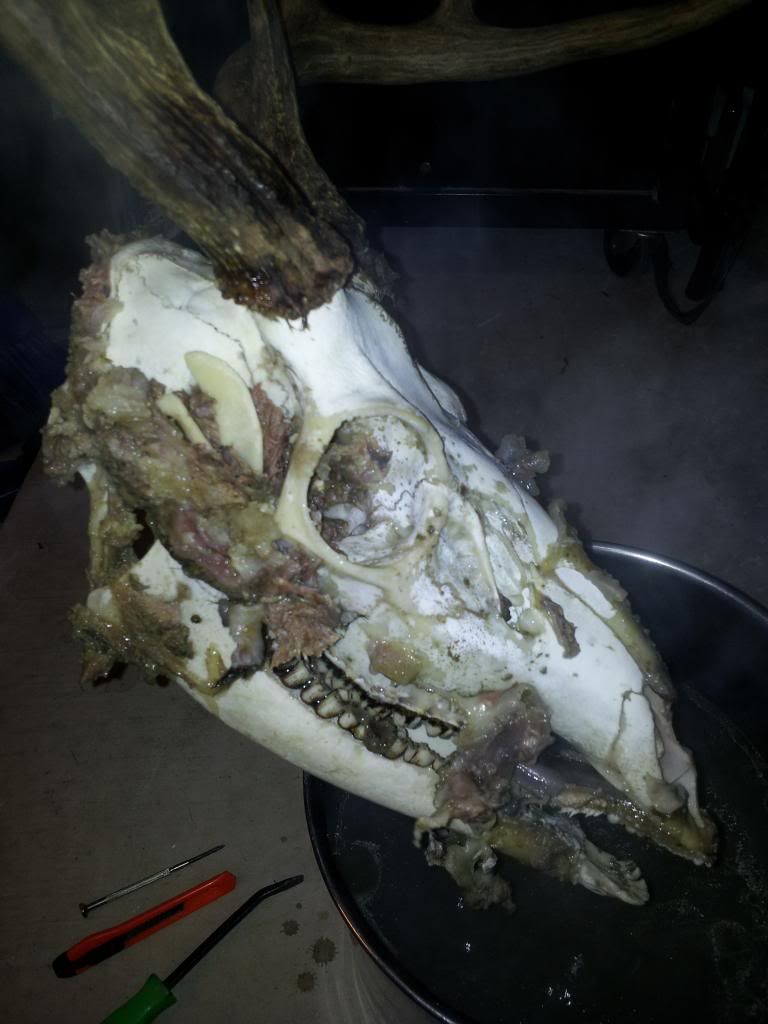
I disconnected the lower jaw to get it out of the way and used a flat-head screwdriver, needlenose pliers, and an exacto knife to start pulling/peeling/cutting away the meat and whatnot. The fork came in handy for the larger chunks in gently pulling them away from the bone. The pliers and screwdriver helped in clearing the brain cavity pretty well. After about an hour, I am left with this:
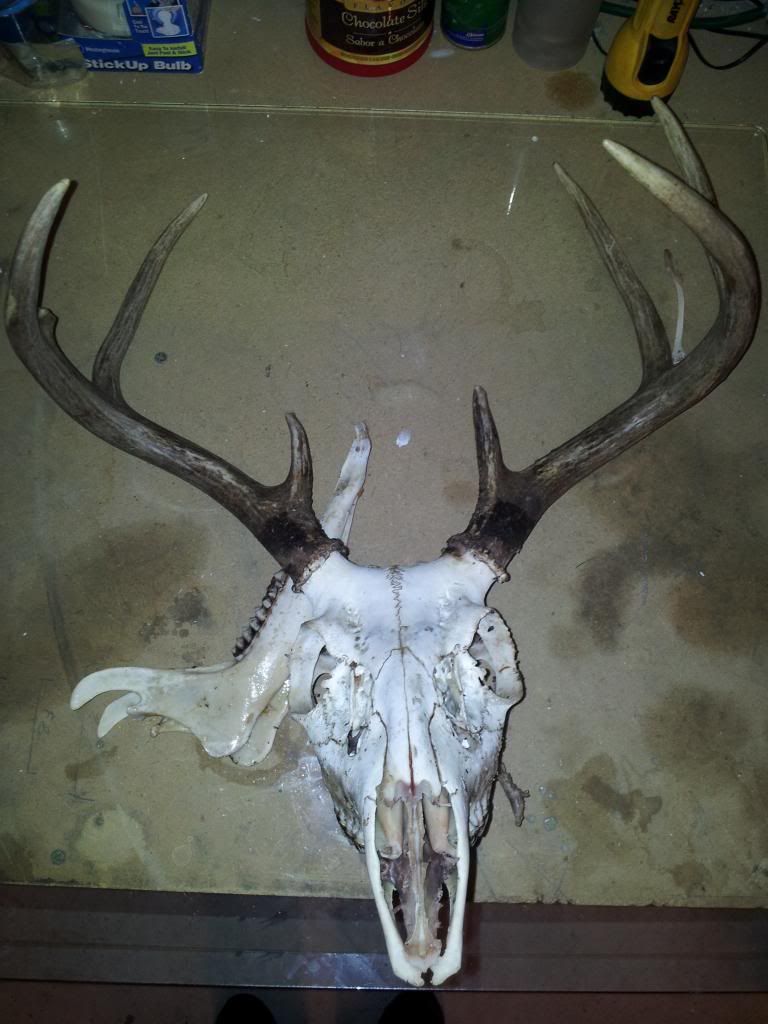
As it was getting late, I placed the skull back in the 5 gallon bucket overnight to keep it from drying out.
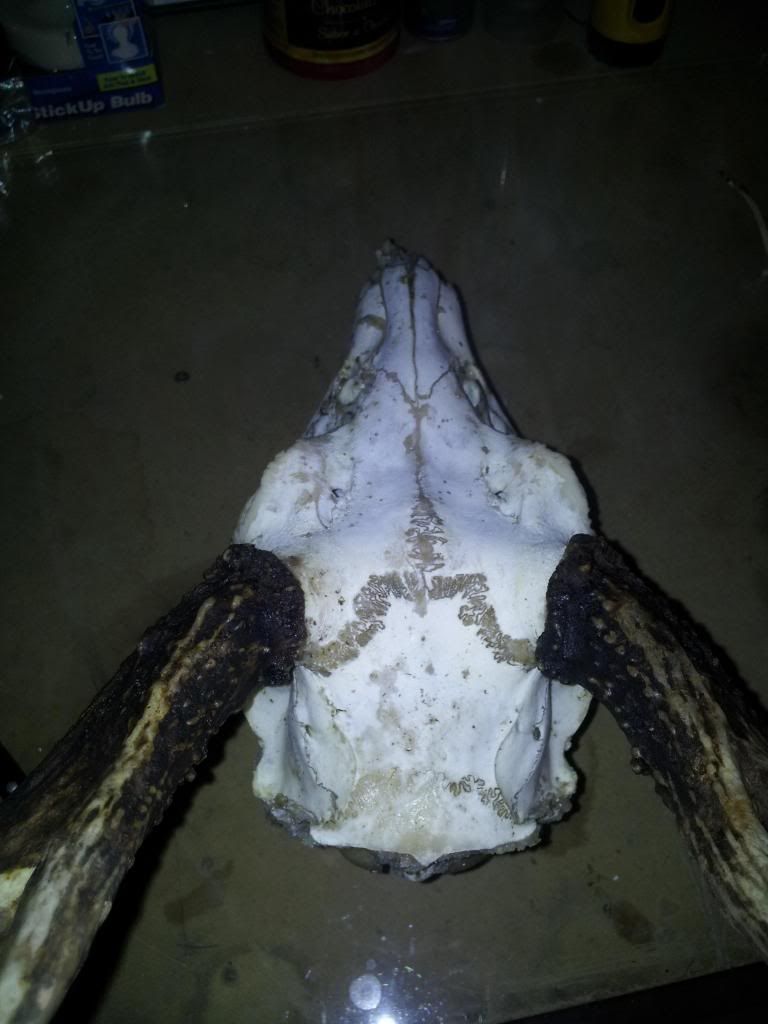
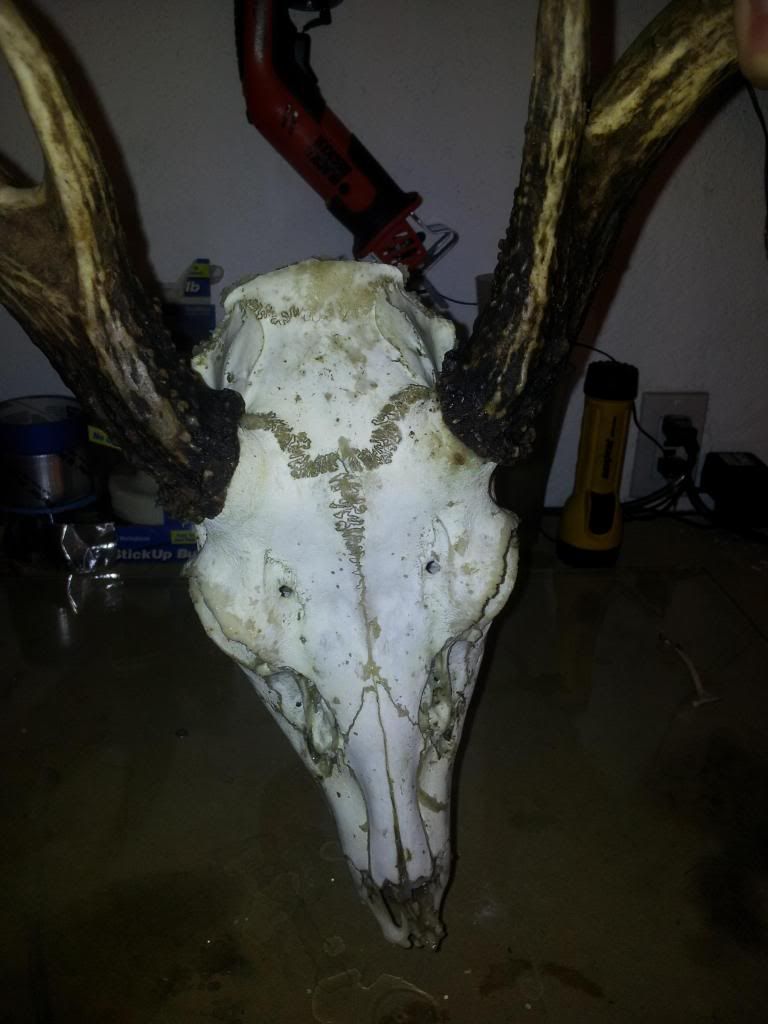
The next night, I boiled the skull for another 4 hours, again with some dish soap. I picked away quite a bit after the two hour mark. Here are some pictures after the second boil.
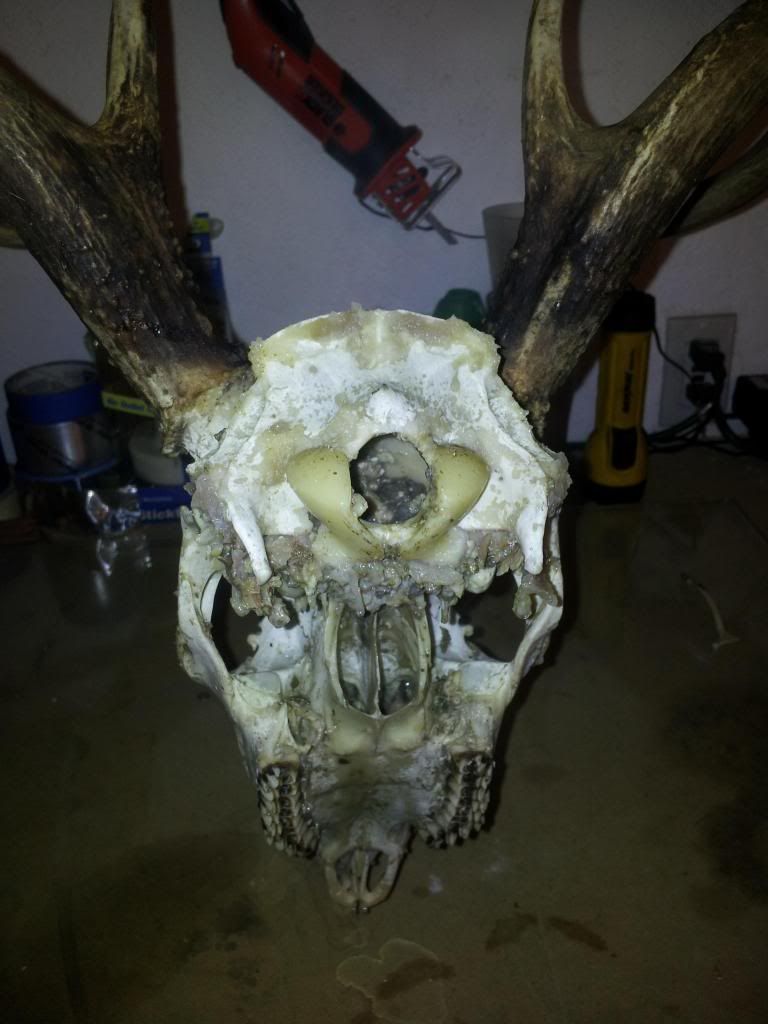
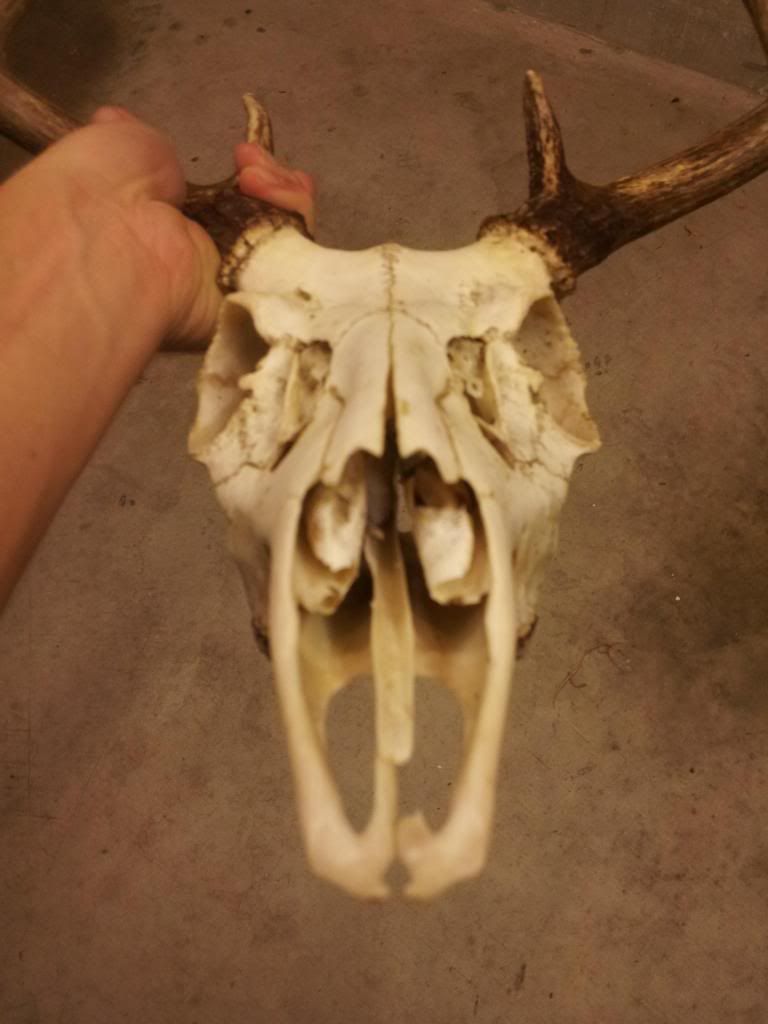
I picked away for about 10 minutes with needle-nose pliers and those mini-screwdrivers you need all of once a year if you don't wear glasses. I hooked up the garden hose and use the "jet" setting on the nozzle. I proceeded to bathe myself and the skull as the contours would redirect water right at me, but it was warm last night, so no big deal. While spraying, focus on the brain cavity and hold the nose up. This will allow you to pull out the remaining parts of the brain with the needle-nose pliers. I probably sprayed the skull down for 15 minutes making sure I caught every part. The most difficult area to clean out was the nasal cavity like I expected. The nasal cartilage in the center of the nose needs to be removed (see pics for how it should look after it is removed). The cartilage and meat go so far back that it's impossible to get out with tools. This is why I started spraying the skull within 15 minutes of pulling it out of the boiling water, as the cartilage and meat were still very pliable. Spraying into the nasal cavity from below the skull (the opening in the roof of the mouth) while loosening what I could through the entrance of the nasal cavity where the nose was with pliers. Eventually the bits should slide out of the nose intact.
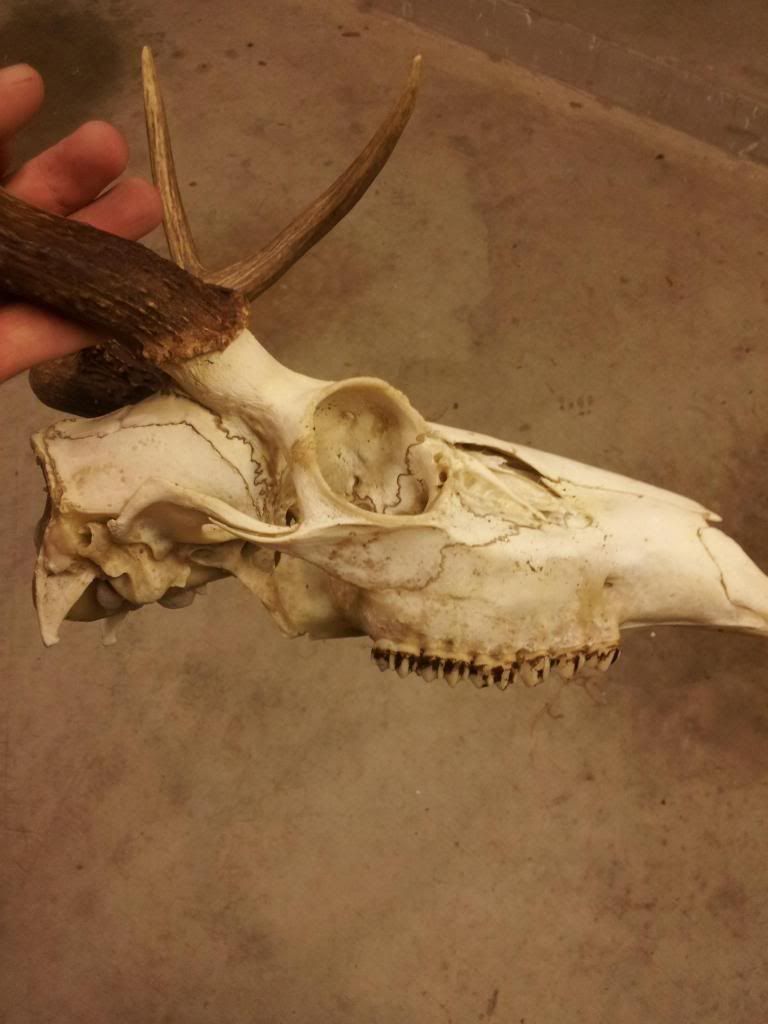
After spraying, I spent another 20 or so minutes picking at the skull to remove any remnants that could eventually rot/smell/etc. Now is the time to go over the entire skull and check for any remaining meat.
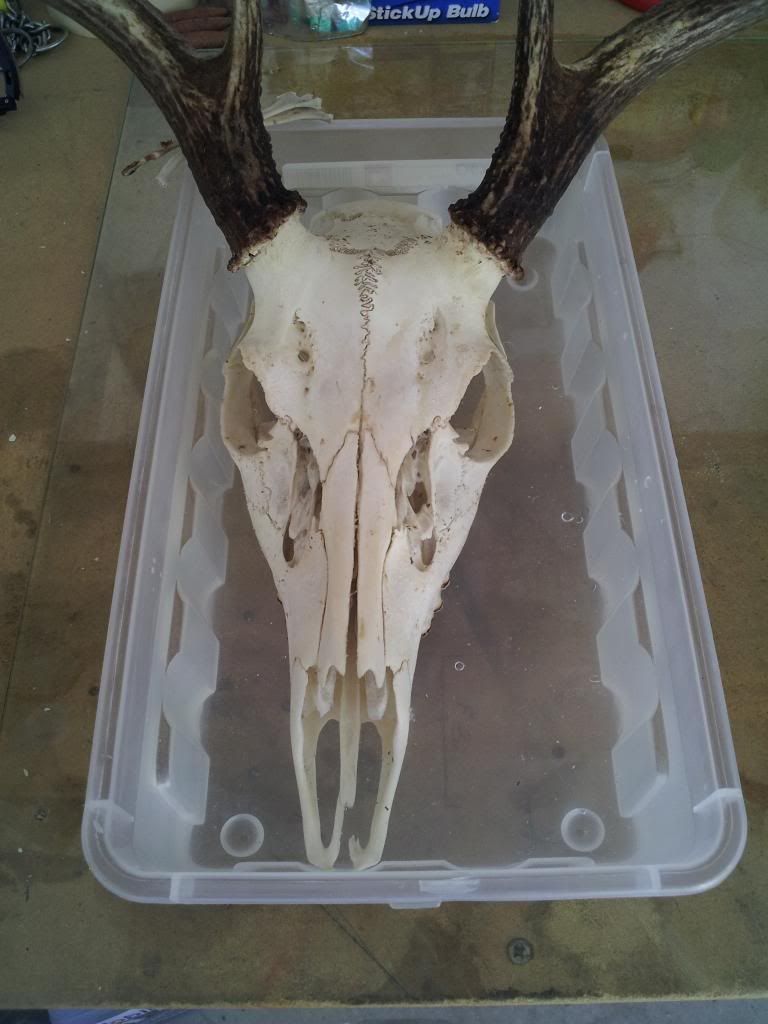
Ready for the peroxide bath:
Here's a tip, make sure the container you are going to use doesn't leak before dumping in the peroxide. Be very careful of the level of the peroxide as it will bleach the antlers. You can again use saran wrap around the bases of the antlers and secure it with tape if you want to be very sure not to get the peroxide on them. I used 2 of the larger bottles of peroxide and added water to bring the level to just below the antlers. Every few hours, I would take a paint brush, dunk it in the peroxide, and lightly brush the top of the skull that was not submerged. Be careful not to use much pressure on the brush as it will splatter peroxide onto the antlers and your clothes.
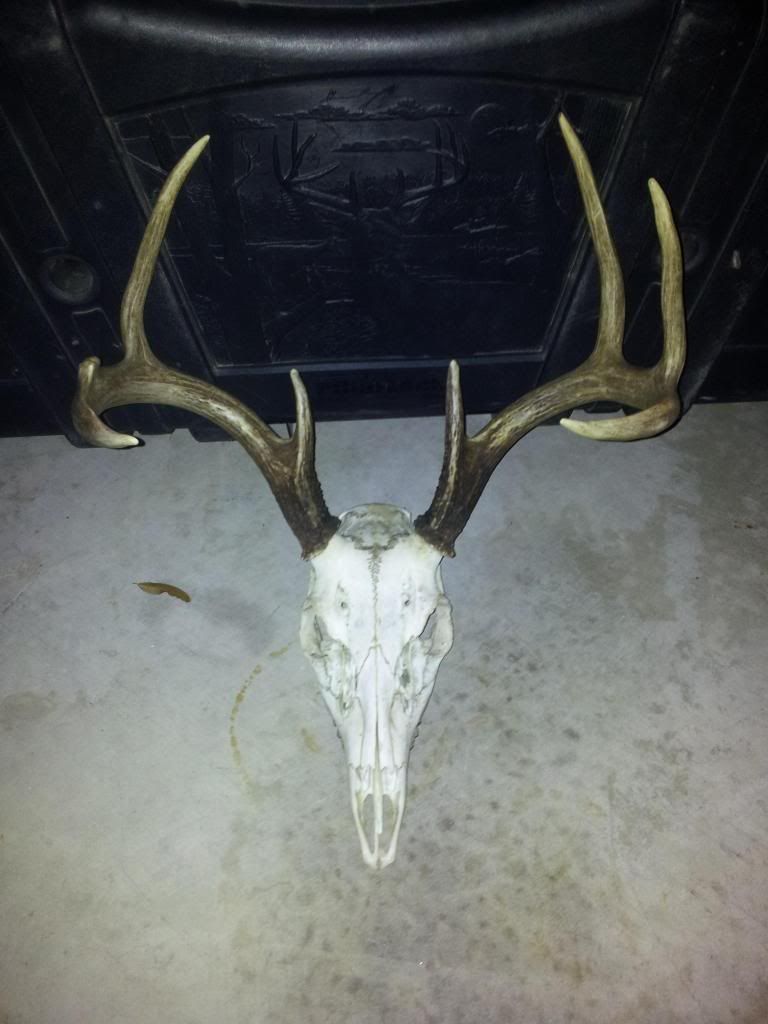
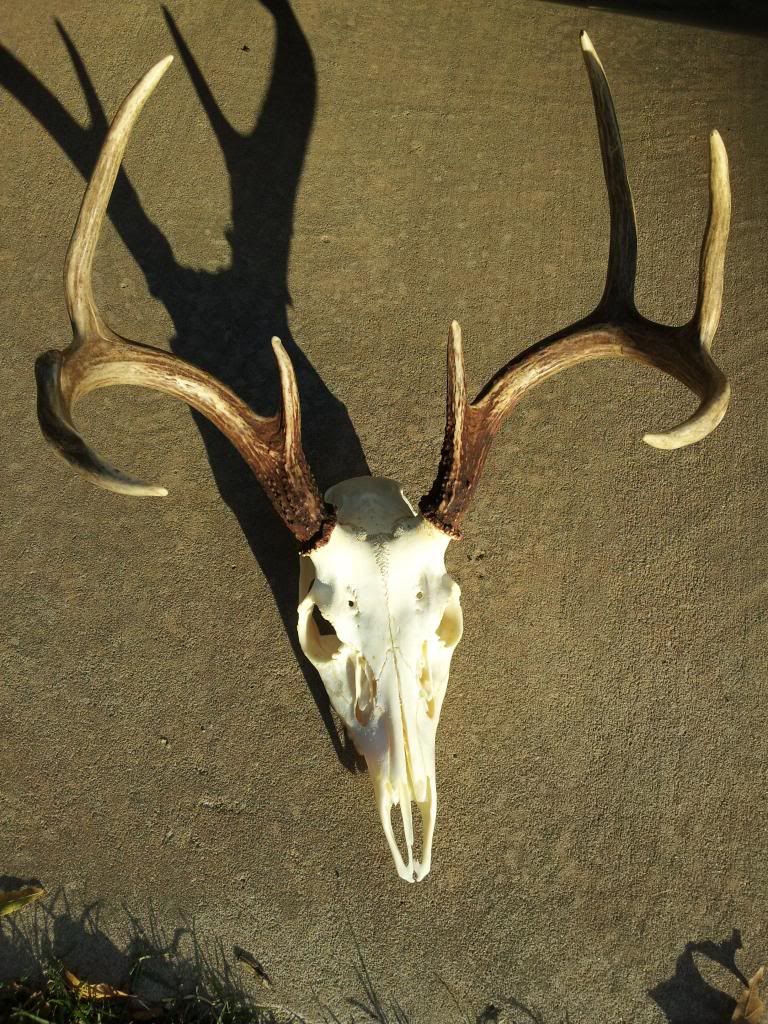
I pulled him out of the peroxide after 24 hours and think I'm good with calling him complete besides brushing his teeth.
No comments:
Post a Comment