A few months ago, The Will To Hunt had several drawings for Muddy Outdoors Products. We won one of those drawings for a Tree Sledge. We wanted to try it out and give it a review.
Upon opening the Tree Sledge, you'll notice the solid feel from it's one-piece construction. The magnet built in to the slot on the backside of the Sledge secures tree steps nicely and it does not feel as though a step may slip out. The sheath is a nice touch as you usually have your hands full when setting up stands. The bright orange, although it is Muddy's signature color is perfect should you drop the Sledge while setting up a stand as it will stand out from all foliage and underbrush. One addition I might suggest after using the Tree Sledge is some non-slip construction on the handle, whether rubber, athletic grip-tape, or otherwise, as you will typically be sweating while setting up stands in the warmer months and it will prevent possible slipping of the Sledge in your grip (we did not experience an issue with this, just an item of note).
In testing the Tree sledge, we used Ameristep screw-in tree steps. The tree we chose to perform the review on is a Scrub Oak. Native to Oklahoma and extremely tough wood, it seemed only right to test the Sledge on the toughest tree we commonly set stands in. Upon swinging the Sledge at the tree, we did notice some bounce back of the step. This appeared to be due to the toughness of the type of tree chosen. After a few swings, it became apparent the step was not seating itself deep enough to start to screw in. Had the step been sharper, or the tree not as hard, it would have seated just fine. I did grab a hammer to assist in digging the step into the tree. With the sledge in place, my fingers were safely out of the way of the hammer and it gave a larger surface to hit versus the step itself. After a few light taps, I was able to use the Tree Sledge to wrench the step into the tree without an issue. The leverage the Tree Sledge provides is great and it saves your hands a lot of abuse while getting the job done quickly. I look forward to putting this tool to a lot of use this Spring and Summer as we hang new stands and reposition our current ones.
We did a video review so that you can see it in action.

Posts about my hunting and fishing trips in trying to Make it Happen Outdoors.
Monday, November 26, 2012
Friday, November 16, 2012
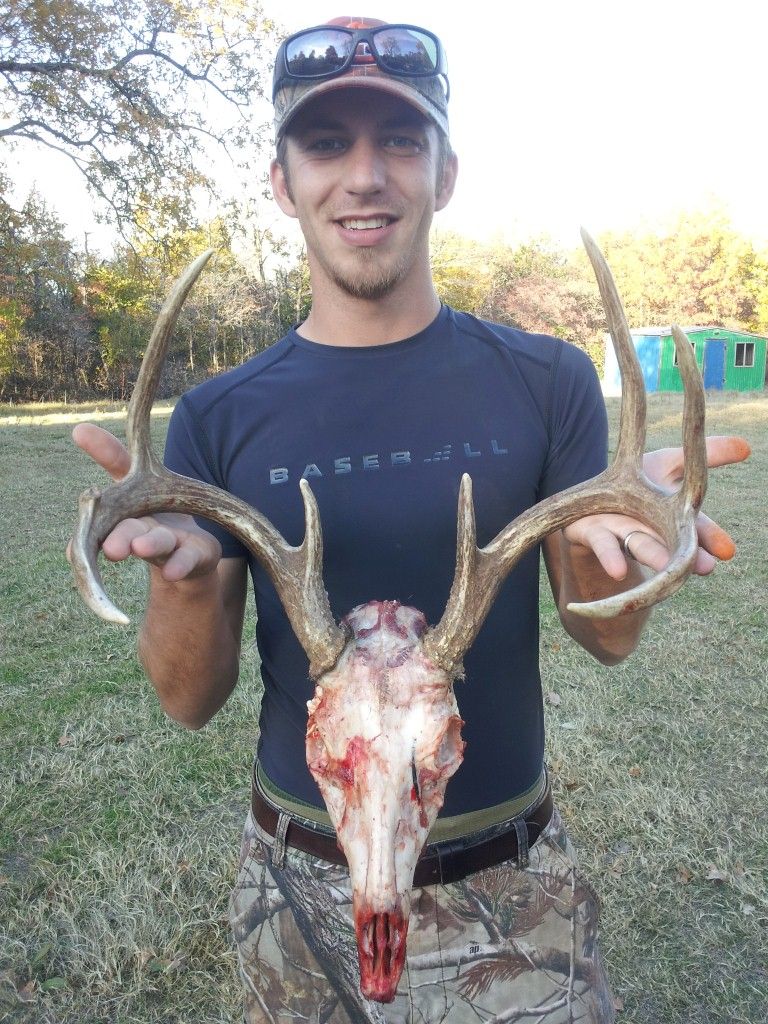
Completed Euro Mount with Step-by-Step Instructions
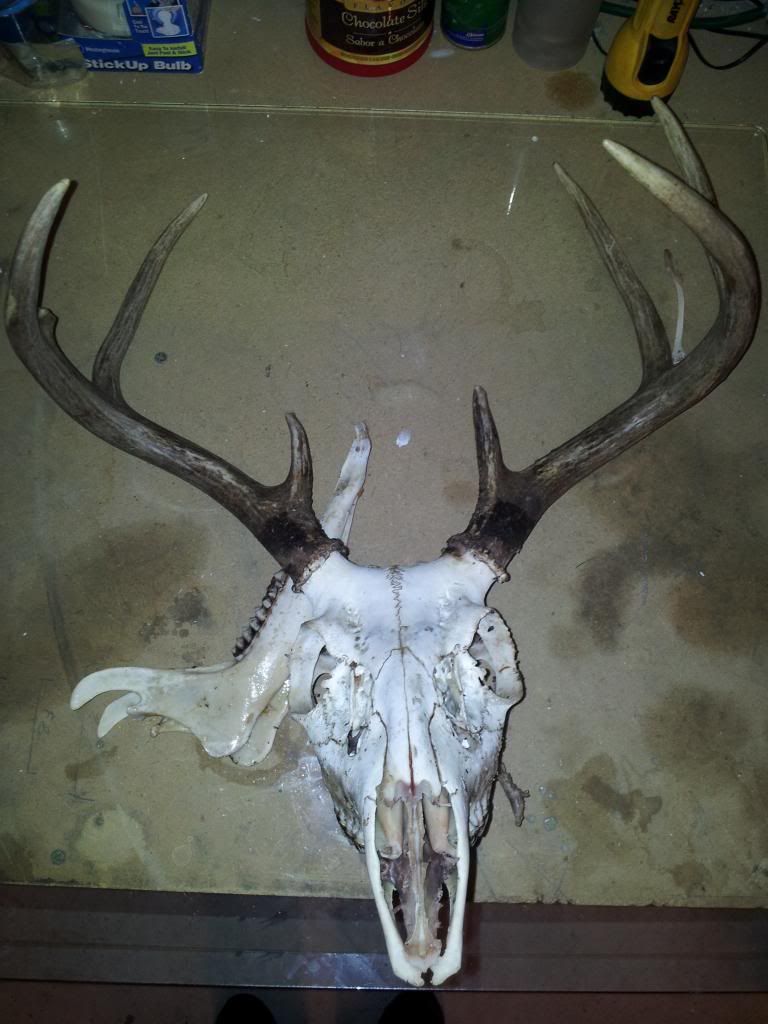
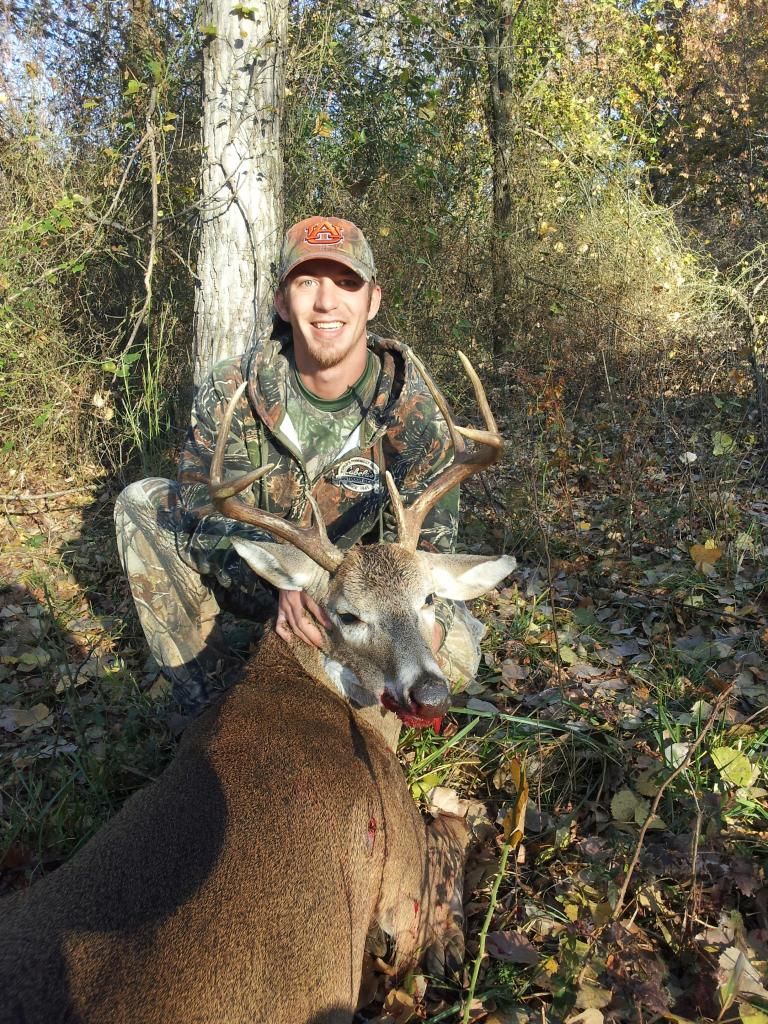
I got this great 7 point on public land November 4th at 35 yards with my bow and decided to do my own euro mount to save money and take on a project I've wanted to complete for some time now.
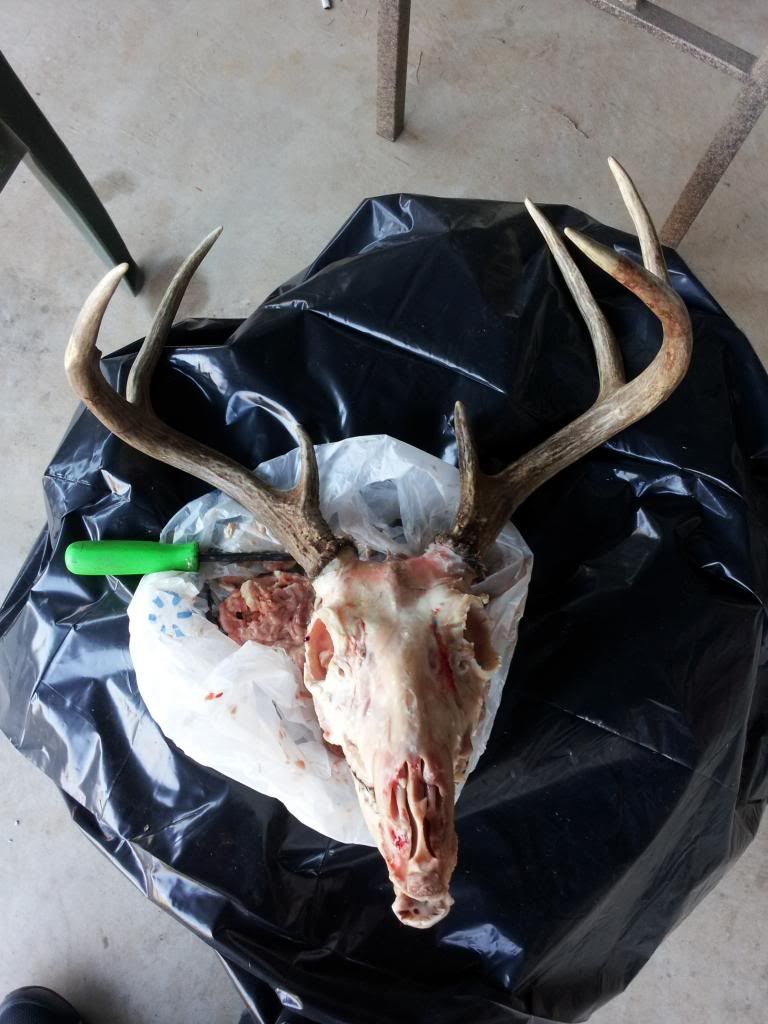
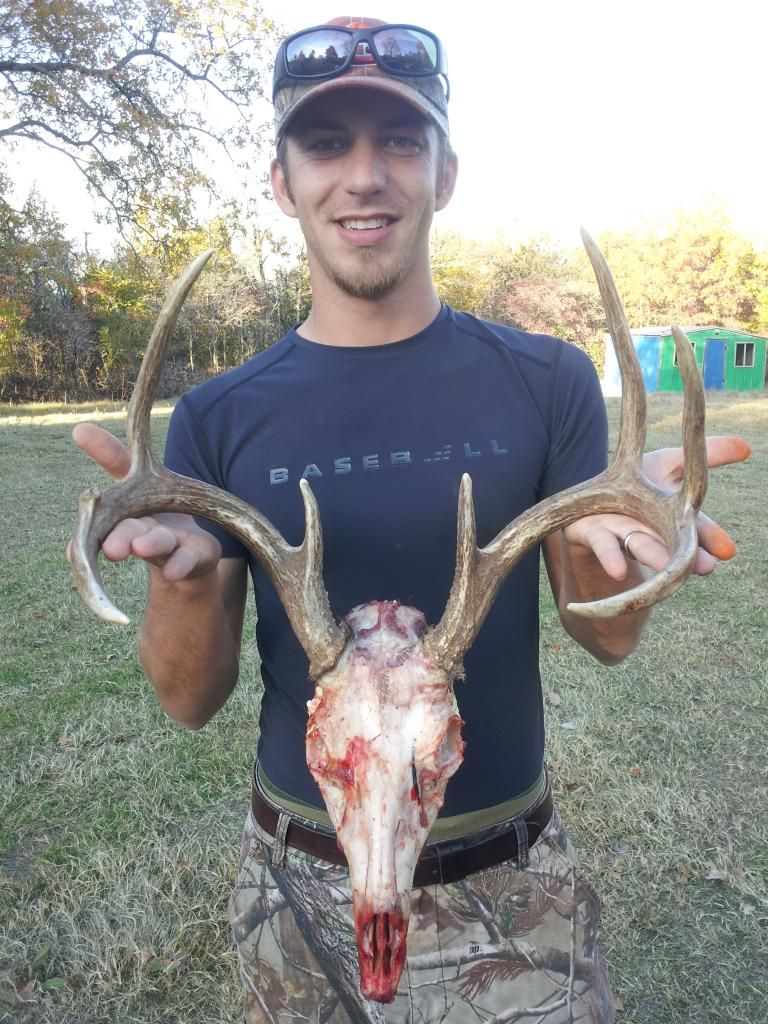
I started by skinning the head within a few hours of the kill. With the muscles and skin still warm, it was pliable and much easier to work with and remove. I used a filet knife to help skin it out. The nose area is tricky as it's mostly cartilage and easily cut. The same with the eye sockets, so be careful what you trim. I nicked mine up pretty good as I was a bit too aggressive with the trimming. The eyeballs are a pain, but with a screwdriver, you can ease them out a bit, then make your cuts around them with the filet knife to remove them. The more meat that is removed now will make your life easier later.
After skinning the head.
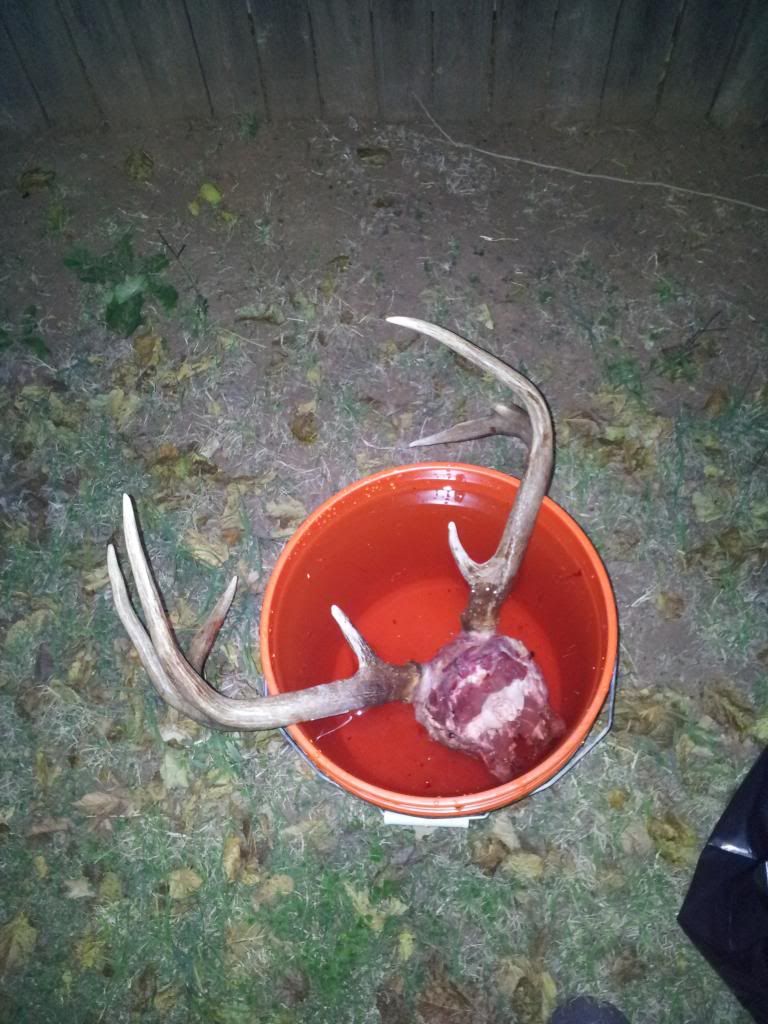
I filled a 5 gallon bucket with just tap water and soaked the skull for 24 hours.
After 24 hours, I pulled the skull out and used a screwdriver to remove as much of the brain as possible. The brain has started to liquefy, but the outer casing of the brain, if you will, is still somewhat attached.
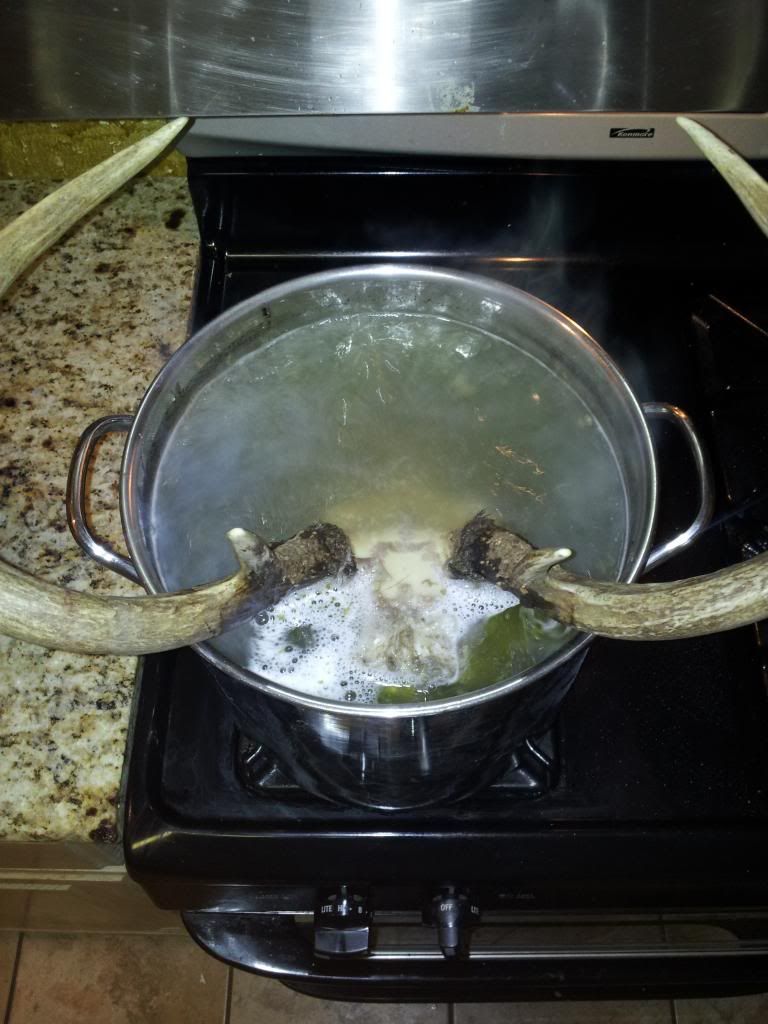
I soaked him for another 24 hours before getting my wife out of the house so I could start boiling the skull. I filled the pot with water, placed the skull in, then set the burner to high. At this point, I added a few drops of dawn dish soap to help with the smell that I knew would occur but also to help cut the grease and fat off the skull. Upon review, I would suggest covering the bases of the antlers in saran-wrap and aluminum foil to prevent the darkening that occurs as the boiled water soaks the antlers. Also, wrap the section of the antler that will touch the pot in aluminum foil to prevent the direct contact with the heat. If the antlers are not large enough to hold them out of the water, use a wire hanger, and gently wrap it around the antler bases then attach it to the handles on the outside of the pot to hold it up.

After an hour, the water finally started boiling. I turned it down a bit as I wanted a slow boil. There was some random junk that had started to float, so I skimmed it out with a fork. Another hour later, I added about two cereal bowls full of water to maintain the water level. The water will start to boil again in about 5 minutes.
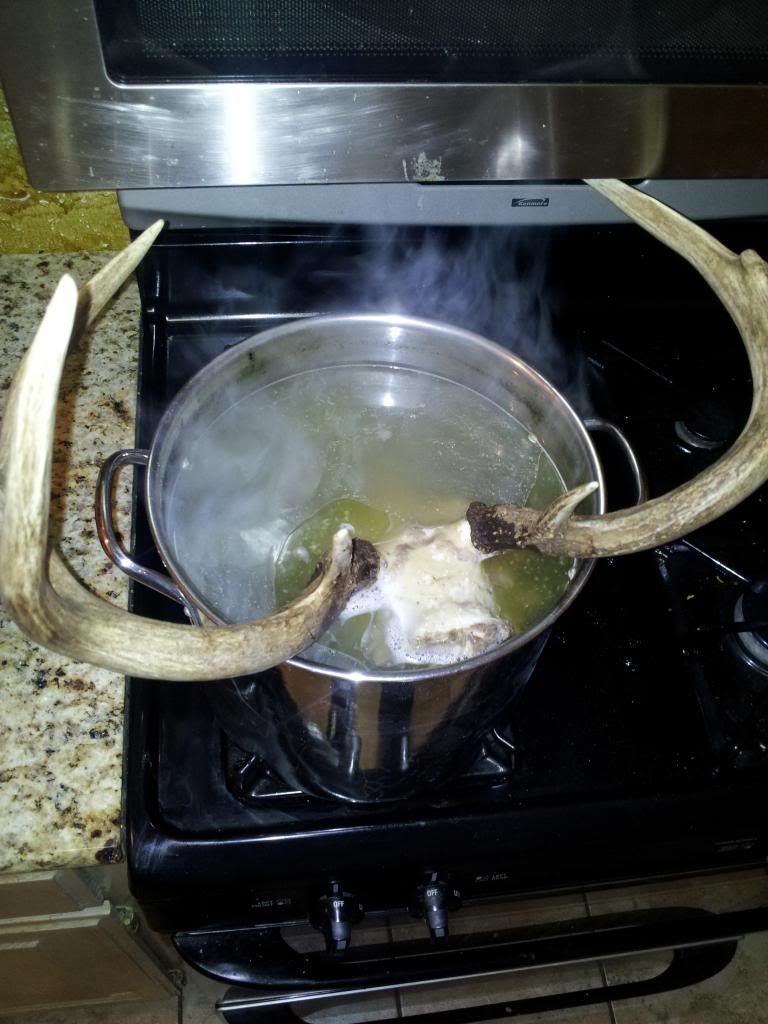
After 3 hours of boiling you could tell stuff was loosening off the bone and I used the fork to pull some of it away. 3 hour mark:
After 4 hours, I pulled the pot off the burner and headed for the garage. 4 hour mark:
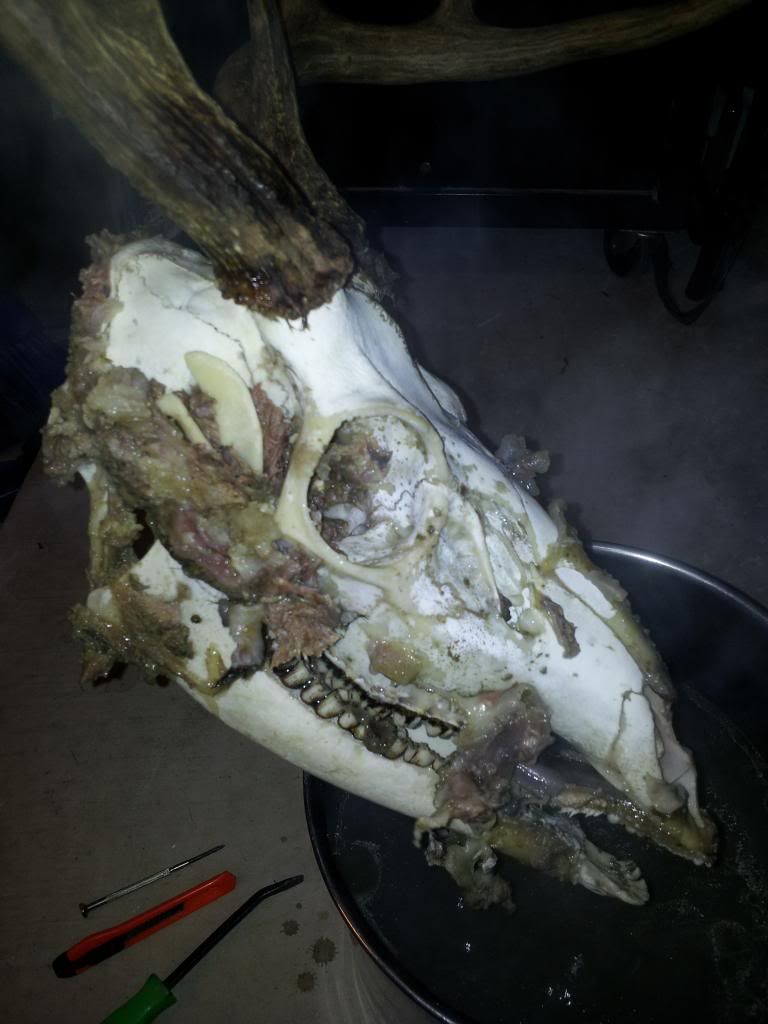
I disconnected the lower jaw to get it out of the way and used a flat-head screwdriver, needlenose pliers, and an exacto knife to start pulling/peeling/cutting away the meat and whatnot. The fork came in handy for the larger chunks in gently pulling them away from the bone. The pliers and screwdriver helped in clearing the brain cavity pretty well. After about an hour, I am left with this:
As it was getting late, I placed the skull back in the 5 gallon bucket overnight to keep it from drying out.
The next night, I boiled the skull for another 4 hours, again with some dish soap. I picked away quite a bit after the two hour mark. Here are some pictures after the second boil.
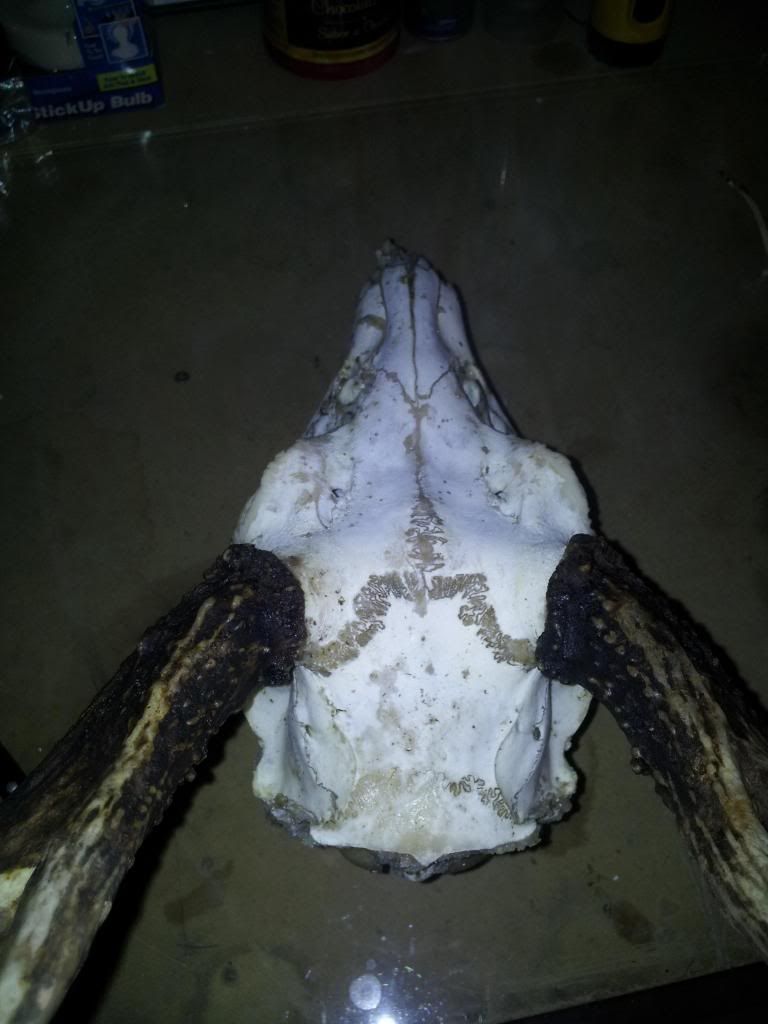
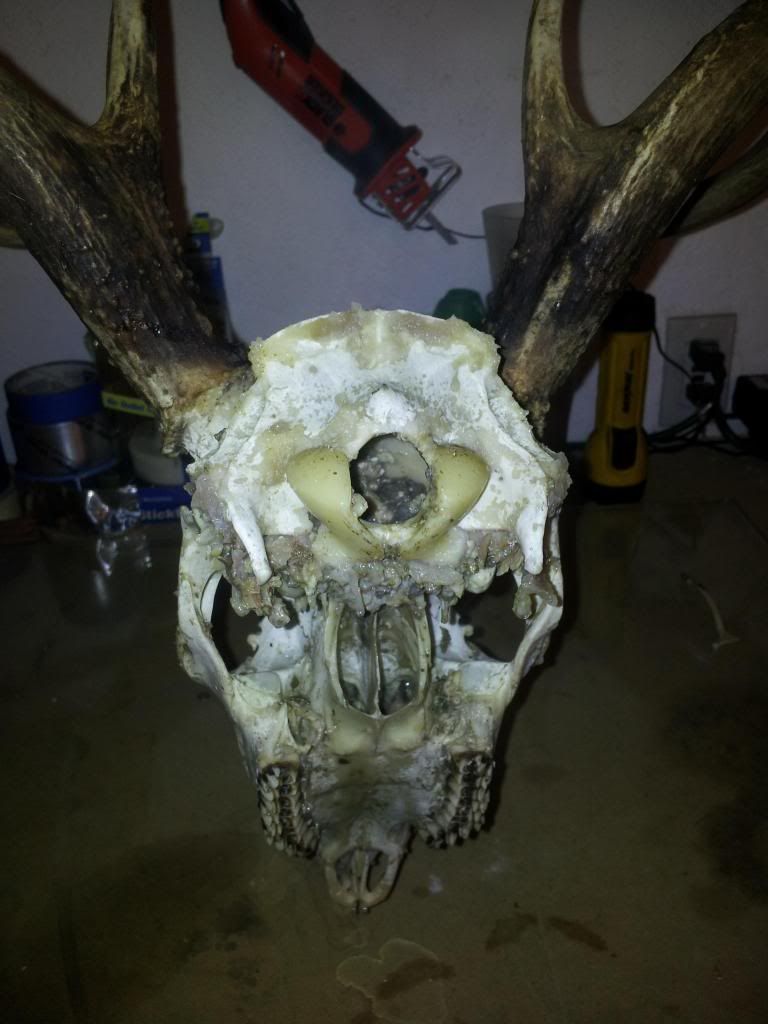
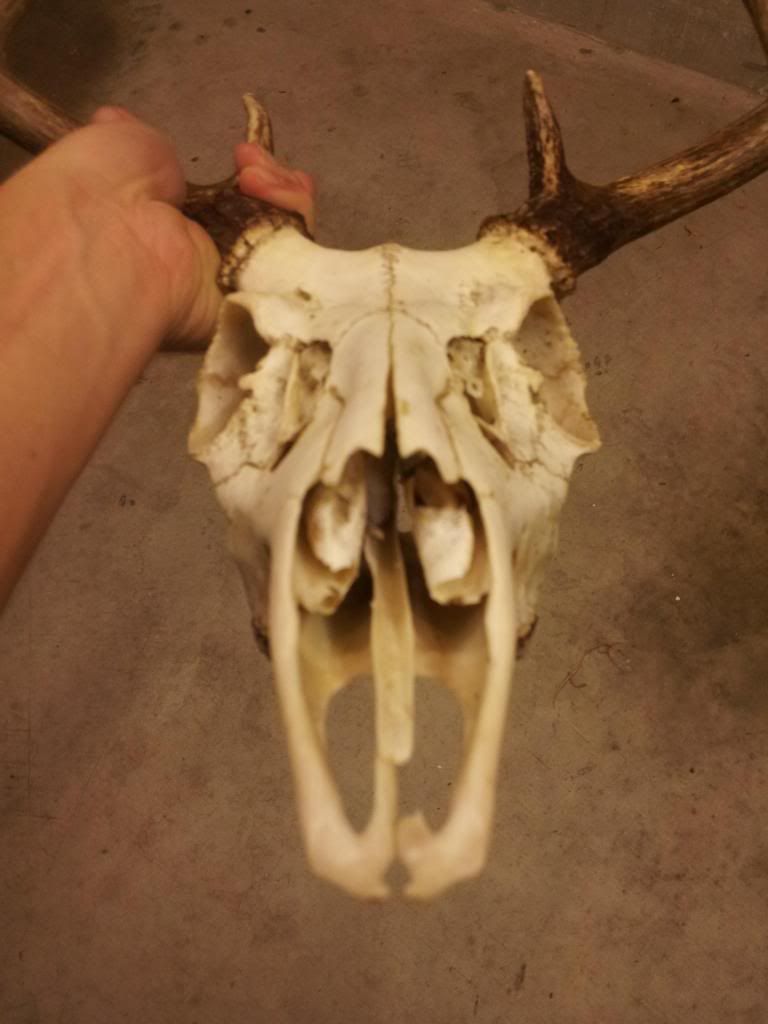
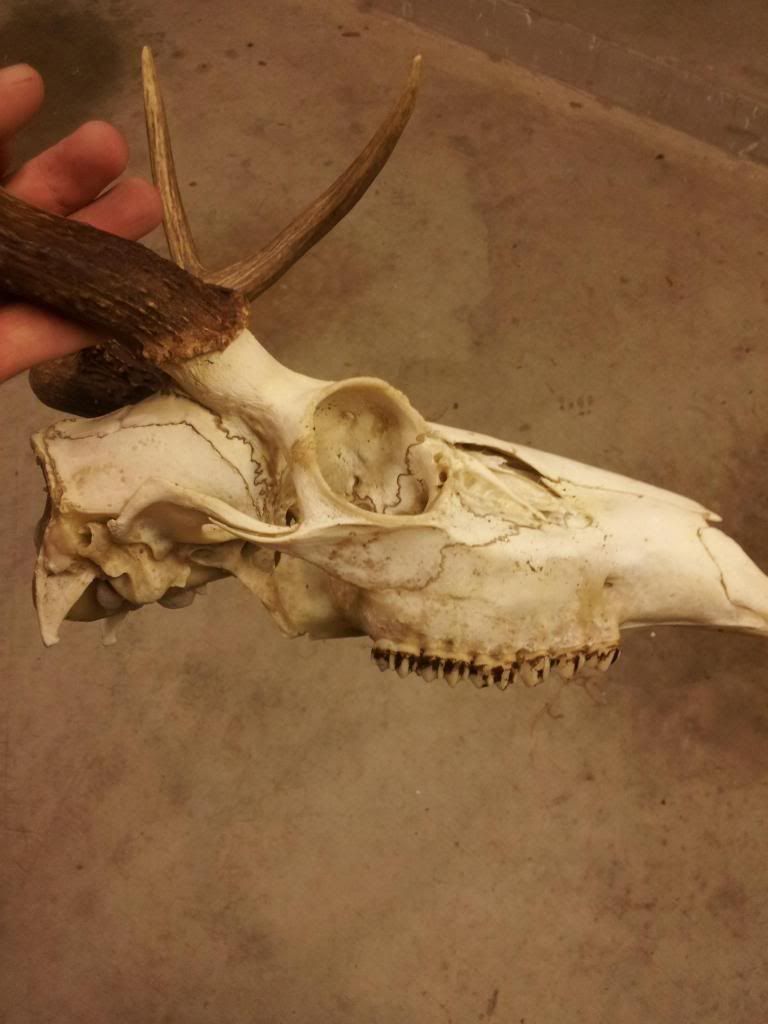
I picked away for about 10 minutes with needle-nose pliers and those mini-screwdrivers you need all of once a year if you don't wear glasses. I hooked up the garden hose and use the "jet" setting on the nozzle. I proceeded to bathe myself and the skull as the contours would redirect water right at me, but it was warm last night, so no big deal. While spraying, focus on the brain cavity and hold the nose up. This will allow you to pull out the remaining parts of the brain with the needle-nose pliers. I probably sprayed the skull down for 15 minutes making sure I caught every part. The most difficult area to clean out was the nasal cavity like I expected. The nasal cartilage in the center of the nose needs to be removed (see pics for how it should look after it is removed). The cartilage and meat go so far back that it's impossible to get out with tools. This is why I started spraying the skull within 15 minutes of pulling it out of the boiling water, as the cartilage and meat were still very pliable. Spraying into the nasal cavity from below the skull (the opening in the roof of the mouth) while loosening what I could through the entrance of the nasal cavity where the nose was with pliers. Eventually the bits should slide out of the nose intact.
After spraying, I spent another 20 or so minutes picking at the skull to remove any remnants that could eventually rot/smell/etc. Now is the time to go over the entire skull and check for any remaining meat.
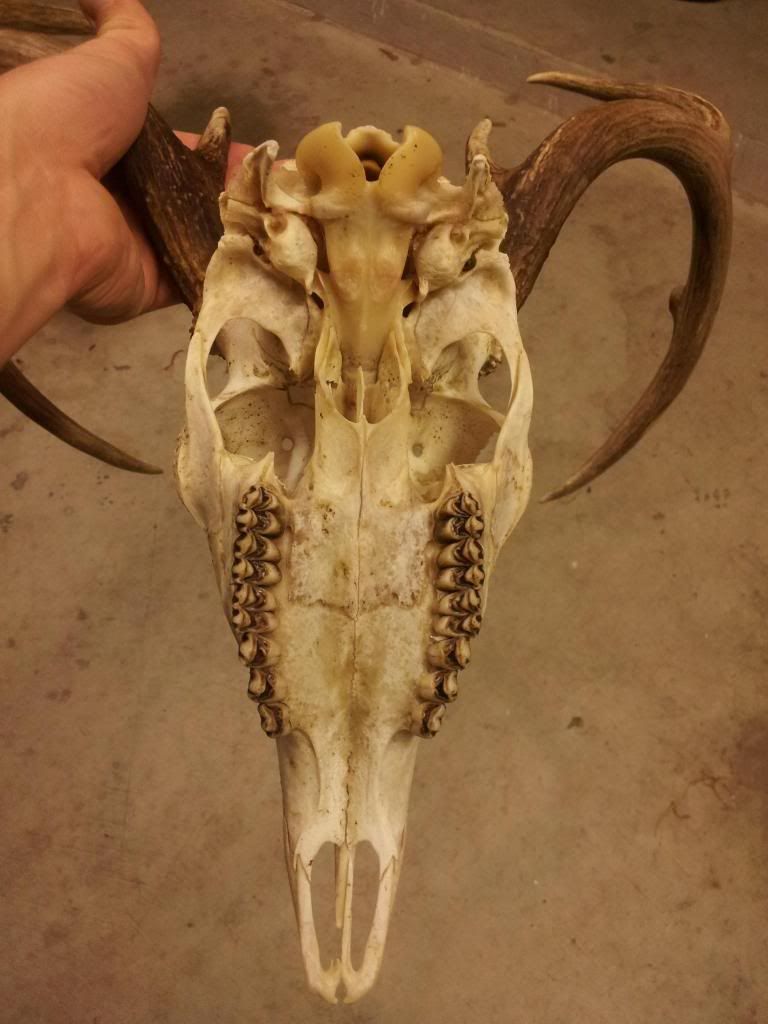
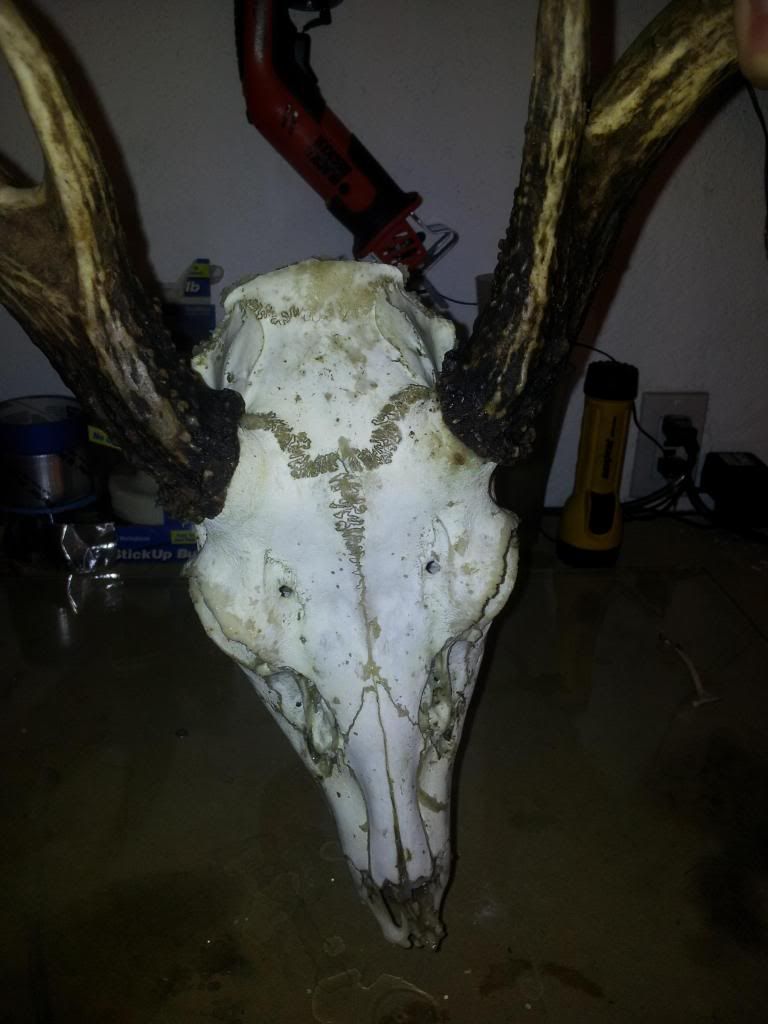
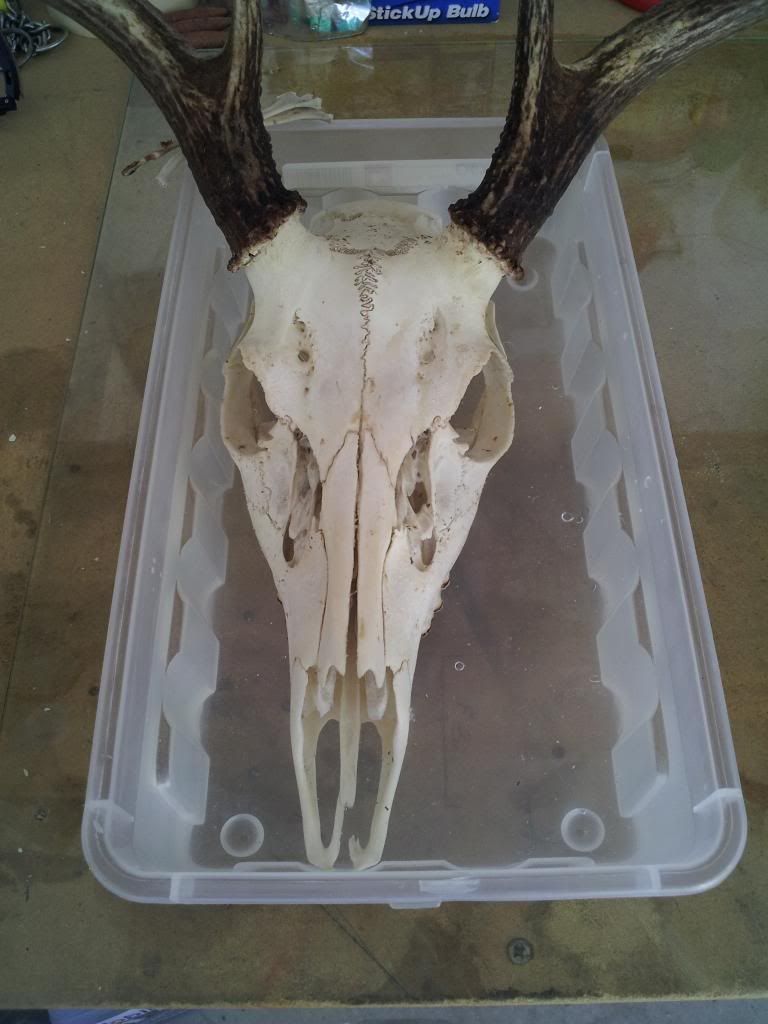
Ready for the peroxide bath:
Here's a tip, make sure the container you are going to use doesn't leak before dumping in the peroxide. Be very careful of the level of the peroxide as it will bleach the antlers. You can again use saran wrap around the bases of the antlers and secure it with tape if you want to be very sure not to get the peroxide on them. I used 2 of the larger bottles of peroxide and added water to bring the level to just below the antlers. Every few hours, I would take a paint brush, dunk it in the peroxide, and lightly brush the top of the skull that was not submerged. Be careful not to use much pressure on the brush as it will splatter peroxide onto the antlers and your clothes.
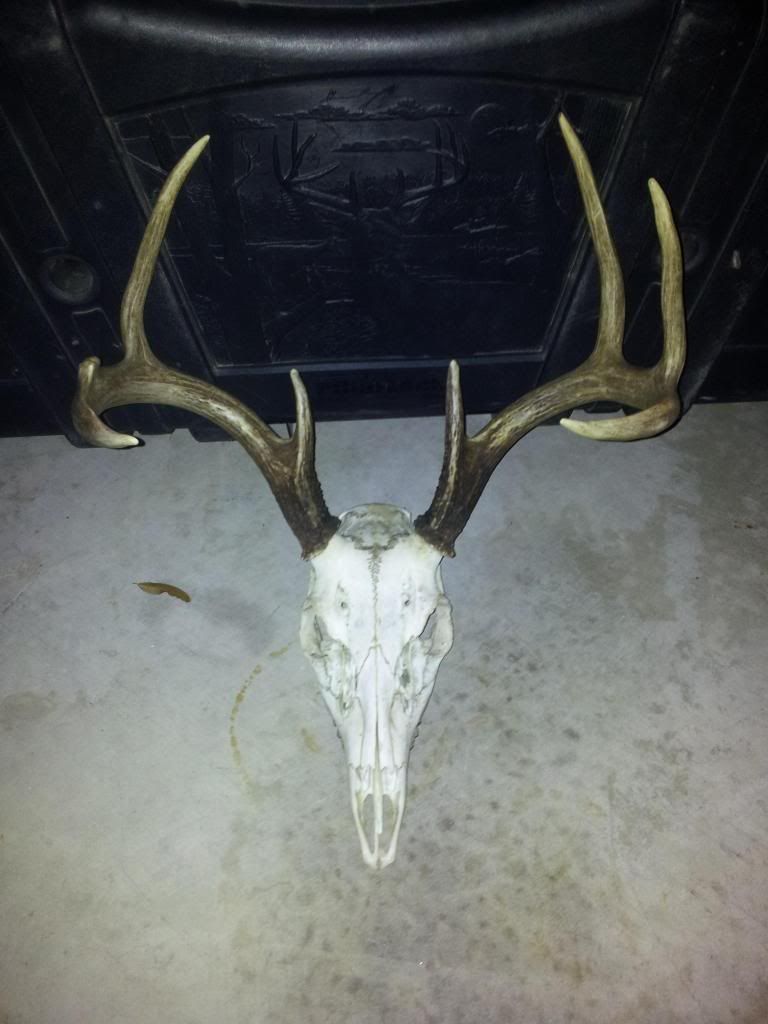
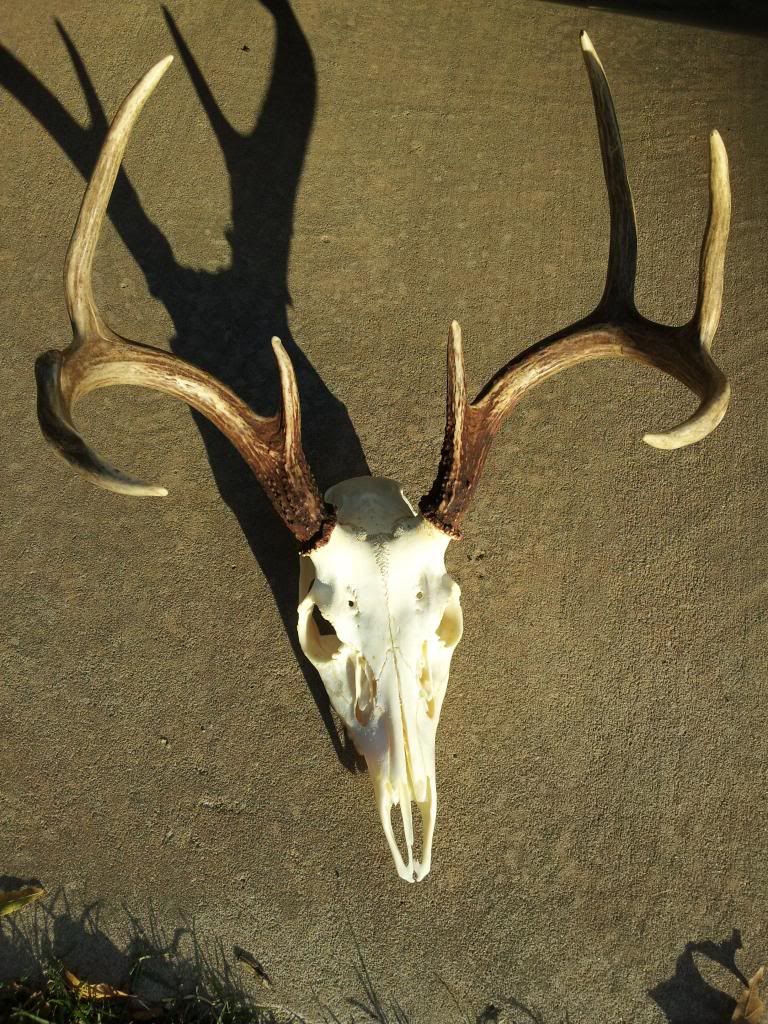
I pulled him out of the peroxide after 24 hours and think I'm good with calling him complete besides brushing his teeth.
I started by skinning the head within a few hours of the kill. With the muscles and skin still warm, it was pliable and much easier to work with and remove. I used a filet knife to help skin it out. The nose area is tricky as it's mostly cartilage and easily cut. The same with the eye sockets, so be careful what you trim. I nicked mine up pretty good as I was a bit too aggressive with the trimming. The eyeballs are a pain, but with a screwdriver, you can ease them out a bit, then make your cuts around them with the filet knife to remove them. The more meat that is removed now will make your life easier later.
After skinning the head.
I filled a 5 gallon bucket with just tap water and soaked the skull for 24 hours.
After 24 hours, I pulled the skull out and used a screwdriver to remove as much of the brain as possible. The brain has started to liquefy, but the outer casing of the brain, if you will, is still somewhat attached.
I soaked him for another 24 hours before getting my wife out of the house so I could start boiling the skull. I filled the pot with water, placed the skull in, then set the burner to high. At this point, I added a few drops of dawn dish soap to help with the smell that I knew would occur but also to help cut the grease and fat off the skull. Upon review, I would suggest covering the bases of the antlers in saran-wrap and aluminum foil to prevent the darkening that occurs as the boiled water soaks the antlers. Also, wrap the section of the antler that will touch the pot in aluminum foil to prevent the direct contact with the heat. If the antlers are not large enough to hold them out of the water, use a wire hanger, and gently wrap it around the antler bases then attach it to the handles on the outside of the pot to hold it up.
After an hour, the water finally started boiling. I turned it down a bit as I wanted a slow boil. There was some random junk that had started to float, so I skimmed it out with a fork. Another hour later, I added about two cereal bowls full of water to maintain the water level. The water will start to boil again in about 5 minutes.
After 3 hours of boiling you could tell stuff was loosening off the bone and I used the fork to pull some of it away. 3 hour mark:
After 4 hours, I pulled the pot off the burner and headed for the garage. 4 hour mark:
I disconnected the lower jaw to get it out of the way and used a flat-head screwdriver, needlenose pliers, and an exacto knife to start pulling/peeling/cutting away the meat and whatnot. The fork came in handy for the larger chunks in gently pulling them away from the bone. The pliers and screwdriver helped in clearing the brain cavity pretty well. After about an hour, I am left with this:
As it was getting late, I placed the skull back in the 5 gallon bucket overnight to keep it from drying out.
The next night, I boiled the skull for another 4 hours, again with some dish soap. I picked away quite a bit after the two hour mark. Here are some pictures after the second boil.
I picked away for about 10 minutes with needle-nose pliers and those mini-screwdrivers you need all of once a year if you don't wear glasses. I hooked up the garden hose and use the "jet" setting on the nozzle. I proceeded to bathe myself and the skull as the contours would redirect water right at me, but it was warm last night, so no big deal. While spraying, focus on the brain cavity and hold the nose up. This will allow you to pull out the remaining parts of the brain with the needle-nose pliers. I probably sprayed the skull down for 15 minutes making sure I caught every part. The most difficult area to clean out was the nasal cavity like I expected. The nasal cartilage in the center of the nose needs to be removed (see pics for how it should look after it is removed). The cartilage and meat go so far back that it's impossible to get out with tools. This is why I started spraying the skull within 15 minutes of pulling it out of the boiling water, as the cartilage and meat were still very pliable. Spraying into the nasal cavity from below the skull (the opening in the roof of the mouth) while loosening what I could through the entrance of the nasal cavity where the nose was with pliers. Eventually the bits should slide out of the nose intact.
After spraying, I spent another 20 or so minutes picking at the skull to remove any remnants that could eventually rot/smell/etc. Now is the time to go over the entire skull and check for any remaining meat.
Ready for the peroxide bath:
Here's a tip, make sure the container you are going to use doesn't leak before dumping in the peroxide. Be very careful of the level of the peroxide as it will bleach the antlers. You can again use saran wrap around the bases of the antlers and secure it with tape if you want to be very sure not to get the peroxide on them. I used 2 of the larger bottles of peroxide and added water to bring the level to just below the antlers. Every few hours, I would take a paint brush, dunk it in the peroxide, and lightly brush the top of the skull that was not submerged. Be careful not to use much pressure on the brush as it will splatter peroxide onto the antlers and your clothes.
I pulled him out of the peroxide after 24 hours and think I'm good with calling him complete besides brushing his teeth.
Sunday, November 11, 2012
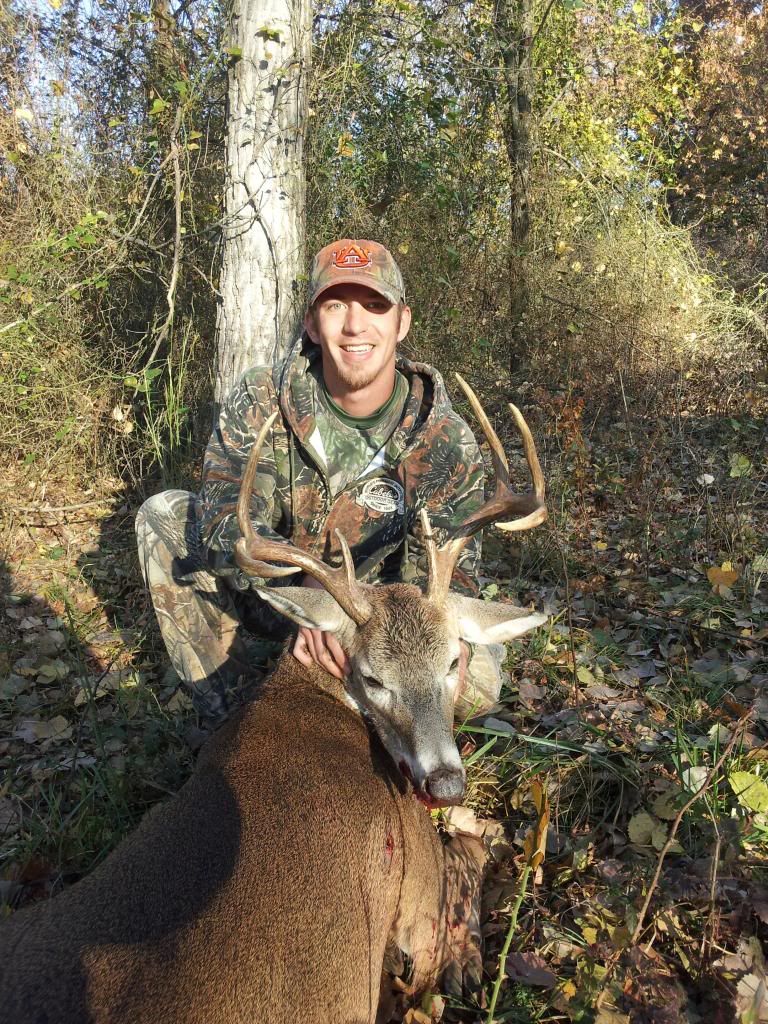
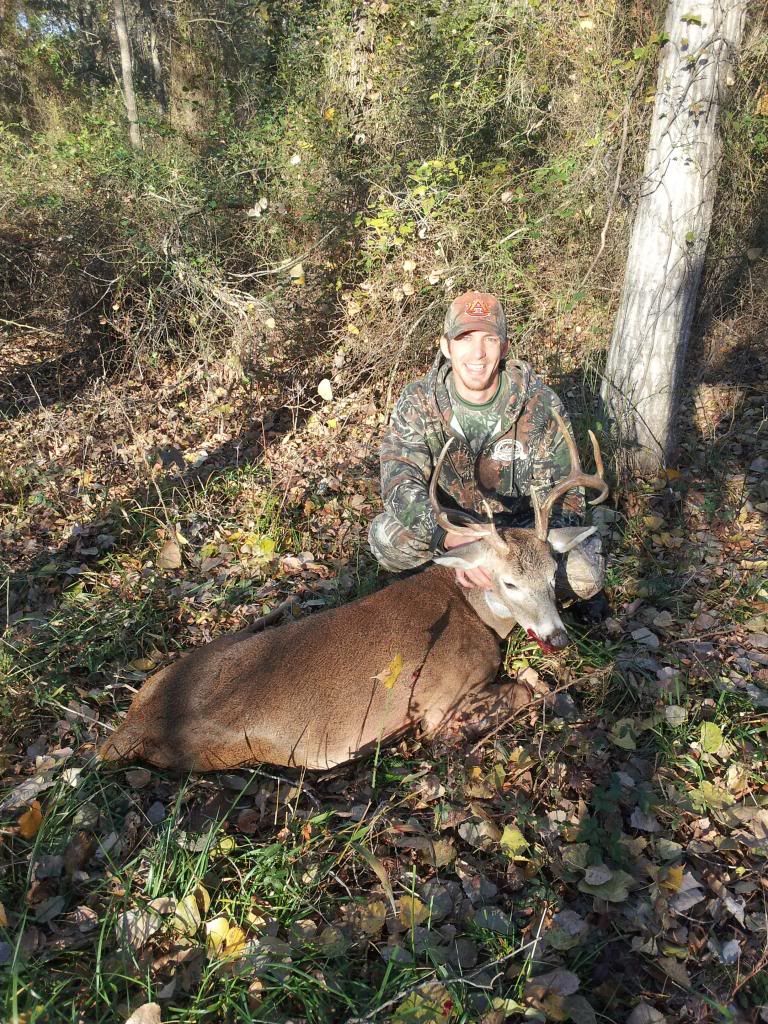
Mature Public Land Buck Down
November 4th, Matt and I decided to hunt out of the same tree for filming purposes. As we headed to our area, we couldn't decide where to sit. The fact that the sky was turning blue pushed us to our closest stand. The tree is pretty small in diameter, so Matt hooked his climber up and went as high as he could, I followed suit and had mine directly below his where I could stand and not hit his foot platform. This only put me 10 feet off the ground. I had set out 3 scent canisters with doe estrous hoping to draw in a buck looking for an early doe. The wind was out of the northwest and the temperature was around 38 degrees.
Shortly after shooting light, I saw movement to our south. I couldn't tell if it was a doe or a buck, so I grunted. Since Matt had already taken a doe during muzzleloader season, I handed him the camera. Neither of us could spot the deer and we spent 20 minutes watching the area for movement. Eventually, we determined the deer had moved off and we started talking. Typically, in this stand, the deer movement happens around 9am, and with the time change, we expected 8am to be the time for deer to move through.
At 7:30, I use my doe bleat. 5 minutes later, a small 8 point came in. Neither of us were going to shoot a smaller buck this year, so we watched as he fed through at 10 yards. The buck walked directly under a scent canister without so much as lifting his head to check it. As he moved off to the south, it seemed as though he got wind of the scent and milled around a bit, but continued to work off to the south. 5 minutes after he disappeared, I bleated 3 times. Matt and I were talking when I looked to the west. There, at 40 yards, was a large buck looking directly at us. I told Matt to not move and get the video camera going, there's a big buck behind him. He whips his head around and sees the buck. Matt tells me he's not filming, but taking a shot with his bow. I replied, "whoever gets the shot first, takes it." The buck works his way through the brush from the west to the southwest, circling our stand. As he's behind a large brush pile, I draw. Matt draws his bow as the buck begins to move again. The buck spots the movement and stops, staring at our tree. What felt like an eternity passed before he continues down the trail. I had previously ranged this shooting lane at 35 yards as it's the same spot I missed a doe 2 weeks prior. I managed to keep my composure, not giving in to buck fever as the buck emerged in the shooting lane. I was lined up, following the buck with my pins on his chest as he walked through the shooting lane. The only thing I forgot was to bleat at him to get him to stop. My brain had quit functioning after I reached full draw. Matt let's out a bleat which snaps me back into reality and the buck stops. My 30 yard pin was high on his chest with the 40 pin near the bottom of his heart. When the buck stopped, I squeezed my release and watch the arrow in take off in slow motion. Life was now playing frame by frame. The arch of the arrow is on target when the sound every bow hunter loves, breaks the silence. THWACK. The fletchings disappear into his chest and he tears off into the thick stuff. I hear Matt say some colorful words about me shooting so quickly as we listen to the buck blazing a trial. "You literally shot him out from underneath me" he says. He circled back to our west, 20 yards further out then where we had originally seen him and his legs started to give out, as did mine. He gets back up, makes two more lunges to the west, and crashes. I lose my composure and set my bow down, getting a firm grip on the stand and what just happened.
A few minutes pass with my gaze set intently on the buck. Matt and I trade verbal jabs and enjoy the moment of success. Successfully killing a large buck with your best friend there to witness it only added to the experience. My composure returns and I lower my bow. After I get my climber removed from the base of the tree, Matt tosses me the video camera. We wait about 15 minutes before going to retrieve my arrow. We find it under a bed of leaves, stained completely red. We look for a blood trial for several minutes, but to no avail. I'm scratching my head as I knew it was a good shot, the arrow is covered in blood, but no trail. We trail deer even when we see them crash to maintain our tracking skills. Not wanting to bust up the area with our scent any more, we go back to our stands and I grab my bow to be safe. As we approach the fallen buck, the dark antlers emerge from the brush and it's apparent he's expired. I set my bow down and grab my trophy. All the hard work before the season to scout, clear stand locations, and go further than the other hunters on public land have culminated into this moment. We guess the buck at 3 1/2 years old and a broken off G3 tine on his right side makes him a large 7 point. He had the remains of a ravaged tree in the base of his antlers and his tarsals were starting to darken. The only blood around was at his mouth. We drag him two hundred yards and gut him. There is a perfect broadhead cut through his left lung, with the right lung decimated. Due to his body size and a slightly high shot, all the blood was held within his chest cavity instead of spilling from the entry and exit wounds. After an extremely long drag, we get him to the truck and make our way to Matt's dad's house to weigh him. Even gutted, he weighed 150 pounds, which is huge for this area of Central Oklahoma. The inside spread of his rack is 14 5/8" with an outside spread of 17".

I decided to attempt my own Euro mount of the skull and will have a "how to" writeup posted once completed.
Shortly after shooting light, I saw movement to our south. I couldn't tell if it was a doe or a buck, so I grunted. Since Matt had already taken a doe during muzzleloader season, I handed him the camera. Neither of us could spot the deer and we spent 20 minutes watching the area for movement. Eventually, we determined the deer had moved off and we started talking. Typically, in this stand, the deer movement happens around 9am, and with the time change, we expected 8am to be the time for deer to move through.
At 7:30, I use my doe bleat. 5 minutes later, a small 8 point came in. Neither of us were going to shoot a smaller buck this year, so we watched as he fed through at 10 yards. The buck walked directly under a scent canister without so much as lifting his head to check it. As he moved off to the south, it seemed as though he got wind of the scent and milled around a bit, but continued to work off to the south. 5 minutes after he disappeared, I bleated 3 times. Matt and I were talking when I looked to the west. There, at 40 yards, was a large buck looking directly at us. I told Matt to not move and get the video camera going, there's a big buck behind him. He whips his head around and sees the buck. Matt tells me he's not filming, but taking a shot with his bow. I replied, "whoever gets the shot first, takes it." The buck works his way through the brush from the west to the southwest, circling our stand. As he's behind a large brush pile, I draw. Matt draws his bow as the buck begins to move again. The buck spots the movement and stops, staring at our tree. What felt like an eternity passed before he continues down the trail. I had previously ranged this shooting lane at 35 yards as it's the same spot I missed a doe 2 weeks prior. I managed to keep my composure, not giving in to buck fever as the buck emerged in the shooting lane. I was lined up, following the buck with my pins on his chest as he walked through the shooting lane. The only thing I forgot was to bleat at him to get him to stop. My brain had quit functioning after I reached full draw. Matt let's out a bleat which snaps me back into reality and the buck stops. My 30 yard pin was high on his chest with the 40 pin near the bottom of his heart. When the buck stopped, I squeezed my release and watch the arrow in take off in slow motion. Life was now playing frame by frame. The arch of the arrow is on target when the sound every bow hunter loves, breaks the silence. THWACK. The fletchings disappear into his chest and he tears off into the thick stuff. I hear Matt say some colorful words about me shooting so quickly as we listen to the buck blazing a trial. "You literally shot him out from underneath me" he says. He circled back to our west, 20 yards further out then where we had originally seen him and his legs started to give out, as did mine. He gets back up, makes two more lunges to the west, and crashes. I lose my composure and set my bow down, getting a firm grip on the stand and what just happened.
A few minutes pass with my gaze set intently on the buck. Matt and I trade verbal jabs and enjoy the moment of success. Successfully killing a large buck with your best friend there to witness it only added to the experience. My composure returns and I lower my bow. After I get my climber removed from the base of the tree, Matt tosses me the video camera. We wait about 15 minutes before going to retrieve my arrow. We find it under a bed of leaves, stained completely red. We look for a blood trial for several minutes, but to no avail. I'm scratching my head as I knew it was a good shot, the arrow is covered in blood, but no trail. We trail deer even when we see them crash to maintain our tracking skills. Not wanting to bust up the area with our scent any more, we go back to our stands and I grab my bow to be safe. As we approach the fallen buck, the dark antlers emerge from the brush and it's apparent he's expired. I set my bow down and grab my trophy. All the hard work before the season to scout, clear stand locations, and go further than the other hunters on public land have culminated into this moment. We guess the buck at 3 1/2 years old and a broken off G3 tine on his right side makes him a large 7 point. He had the remains of a ravaged tree in the base of his antlers and his tarsals were starting to darken. The only blood around was at his mouth. We drag him two hundred yards and gut him. There is a perfect broadhead cut through his left lung, with the right lung decimated. Due to his body size and a slightly high shot, all the blood was held within his chest cavity instead of spilling from the entry and exit wounds. After an extremely long drag, we get him to the truck and make our way to Matt's dad's house to weigh him. Even gutted, he weighed 150 pounds, which is huge for this area of Central Oklahoma. The inside spread of his rack is 14 5/8" with an outside spread of 17".
I decided to attempt my own Euro mount of the skull and will have a "how to" writeup posted once completed.
Tuesday, November 6, 2012
Starting to See Some Action
October 21st, Matt and I headed out to a stand we scouted just before the season. None of us have sat in the location. We picked what we expect to be the perfect wind and both climbed the same tree. At daybreak, a flock of crows found an owl not far from us and went crazy. For no less than 30 minutes, we couldn't hardly hear each other talk as the crows scolded the owl. During this time, I spotted a deer coming down the hill toward us from the Southeast. I saw that it was a doe and shortly behind her, another doe appeared. They worked there way toward us and stopped at 40 yards. I could see they were getting antsy, and one flagged and trotted back up hill. A minute later, the second doe followed. We had a South wind at 5mph, but, with the air warming in the morning, and the wind being light, I could guess it was swirling some and the does picked it up. About an hour and a half later, a deer was heading our way from directly south of us. He ended up being a 3-point that offered multiple shot opportunities. I drew on him for practice and held for about a minute. In doing this, it helps me solidify my shot sequence when the opportunity presents itself. The buck fed on acorns at 12 yards for 15 minutes as Matt and I watched. He looked up at us a time or two and went back to feeding. He eventually turned around and retraced his original path as he left.
October 28th Matt was with his Dad muzzleloader hunting near Kansas. I stayed behind and hunted our usual areas with my bow. A cold front moved through and I knew the deer would be on their feet. The first hour and a half were uneventful and the tree rocking in the wind threatened to put me to sleep. Just after 9:00am, I heard something crashing through the woods heading toward me. 2 does explode from the scrub brush and into an opening 40 yards away, nervously looking behind them. I knew what to expect and had my bow ready. The does trotted another 30 yards to the East, but I was focused on where they'd come from. A few seconds pass, and I can make out a figure moving through the woods. A buck emerges on the same trail as the does, again, 40 yards away. He appears to be an 8 point, but slightly basket-racked. I'd imagine he was a two year old due to his size, build, and that he's chasing does early. The does continued off into the woods away from me while the buck finds some low hanging branches to thrash. I watched as he made a scrap, then I grunted at him. Even though he was marking his territory, he looked my way, then turned to follow the does. I grunted again, to no avail. 10 minutes later, I hear footsteps behind me. I turn and see a hunter attempting to "still-hunt" through the woods. I whistle at him and he stops. I wave to let him know I'm there and thankfully he turned around and disappeared the way he'd come. Another hour passes before I spot a doe moving to my Northwest. She eases by at about 45 yards and circles to my South without ever getting closer. As I'm watching her, I notice the same buck is about 80 yards behind her, but again, out of range. I grunted again, and he stops. After a few moments of glaring in my direction, I snort-wheeze. He's not impressed by this and follows the doe out of sight.
Matt successfully harvested a doe while muzzleloader hunting at 60 yards. No larger bucks presented him an opportunity. Mark, Matt's Dad, having already taken 2 does this year, was holding out for a buck. He saw several great bucks, but they were around 200 yards. The next day, he eased into the wood-line within 75 yards of where the bucks had been passing the previous 2 days. A few hours into his hunt, he caught movement in the woods and brought his binoculars up to check the size of the deer. He saw plenty of antler and prepared for the shot. The buck was in a hurry and was not going to slow down. Mark took care in his shot placement and pulled the trigger. The buck took off, but did not make it far before crashing. From looking at his teeth, he appears to be a great 2 year old, possibly a 3 year old.

The bucks are starting to move!
Subscribe to:
Posts (Atom)